Modak Recipe

Prep Time :- 5 mins

Cook Time :- 20 mins

Course :- sweet

Cuisine :- maharashtra

Servings :- 12 modak

Calories :- 221 kcal
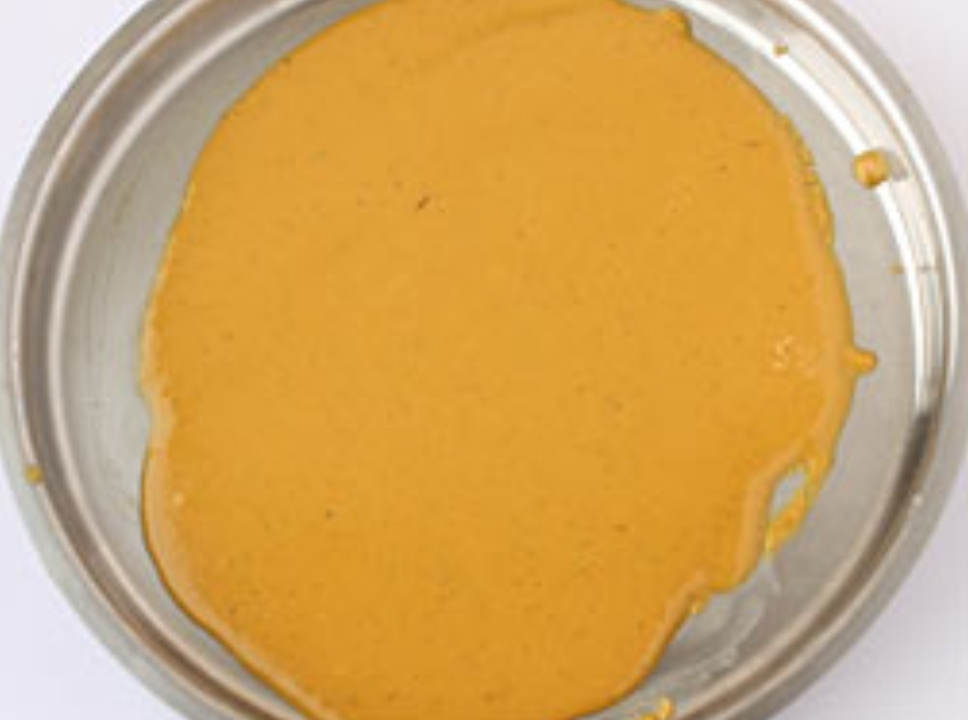
|| INGREDIENTS ||

for stuffing:

for dough:

INSTRUCTIONS

stuffing preparation: –

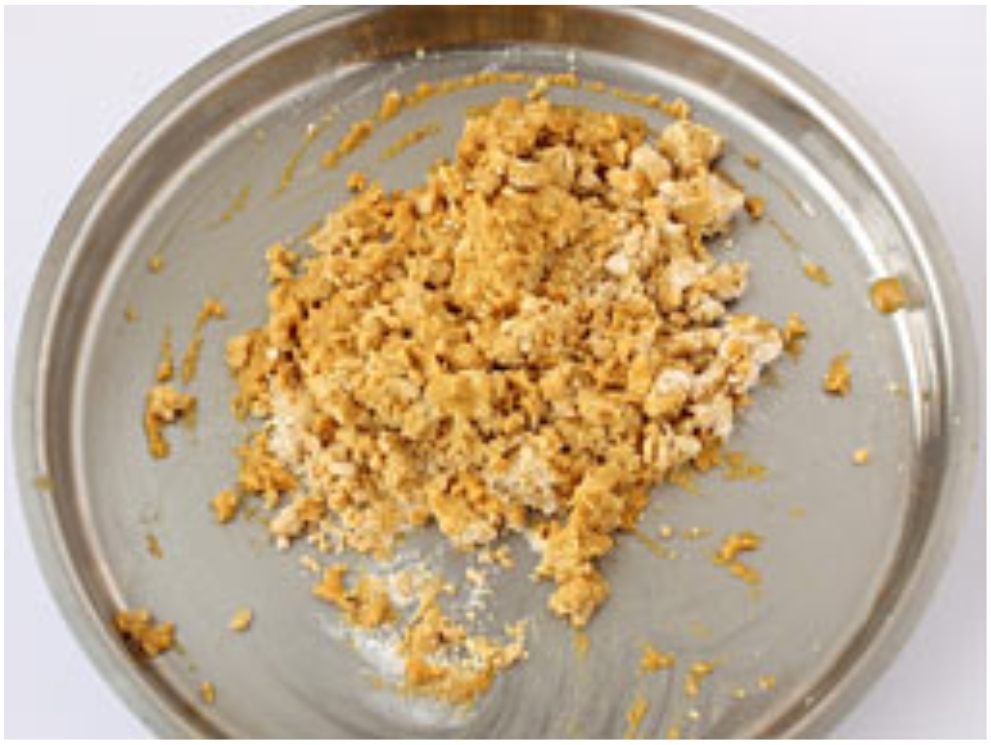
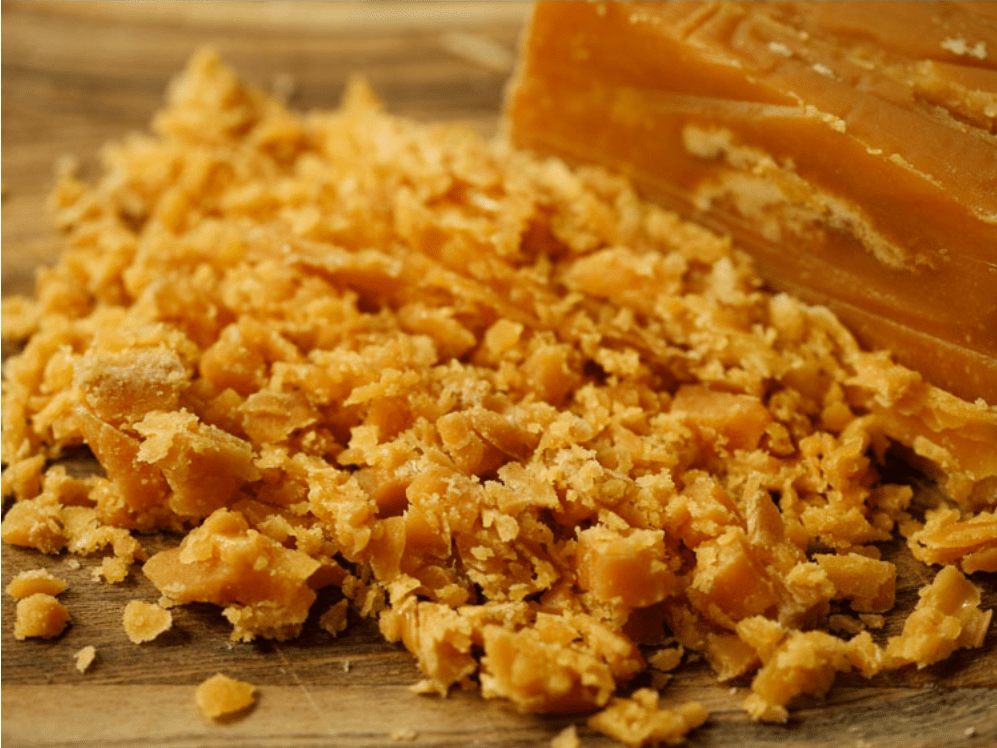
1 :- Chop the jaggery and keep aside. Also grate the coconut and set aside. You will need 1 cup jaggery and 1 cup fresh grated coconut.

If you do not have access to fresh coconut, then use frozen coconut or desiccated coconut. For desiccated coconut use fine grates or fine shreds.

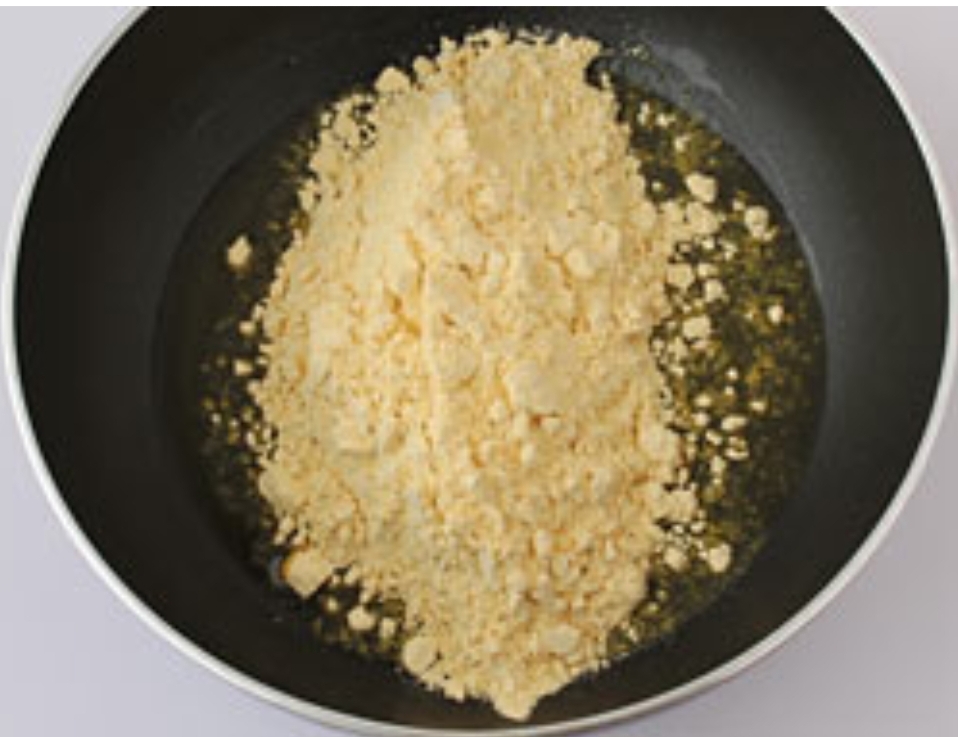
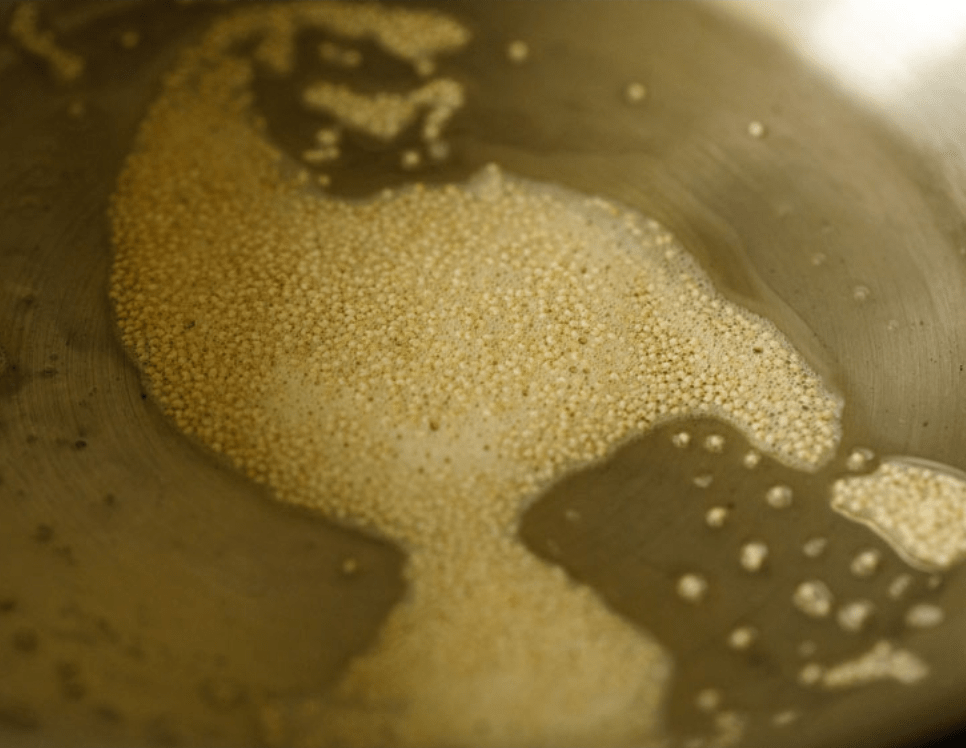
2 :- Heat ghee in a pan. Add ½ teaspoon poppy seeds. Keep flame to a low. Fry for some seconds till the poppy seeds start crackling.

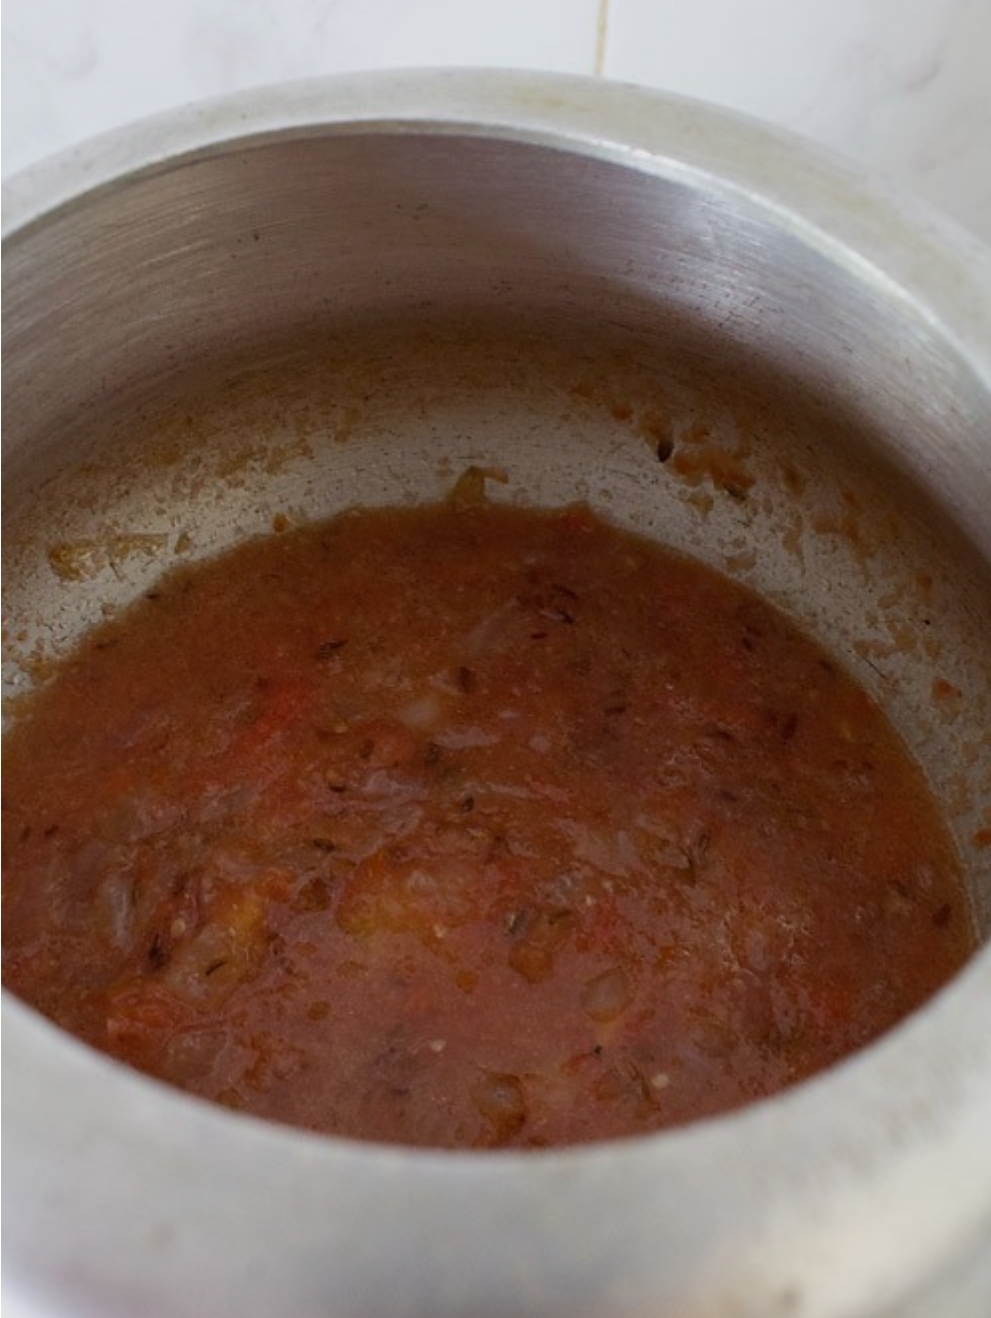
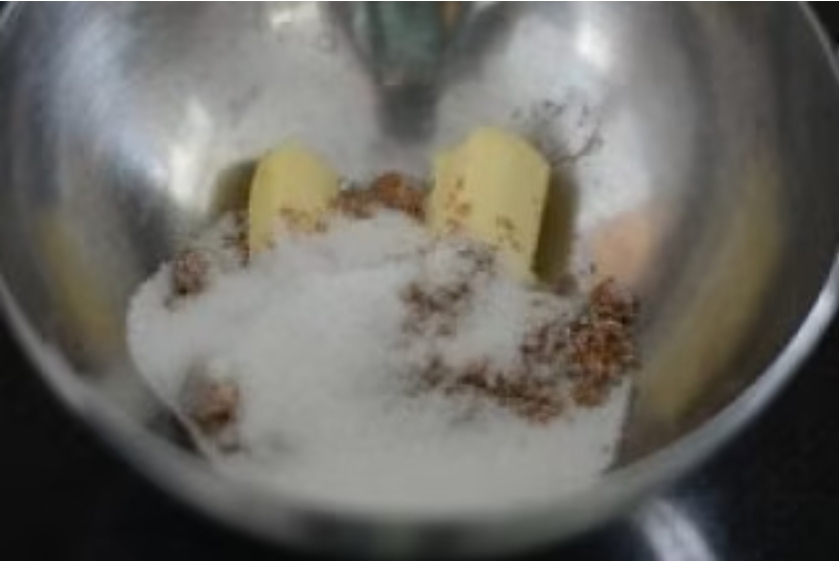
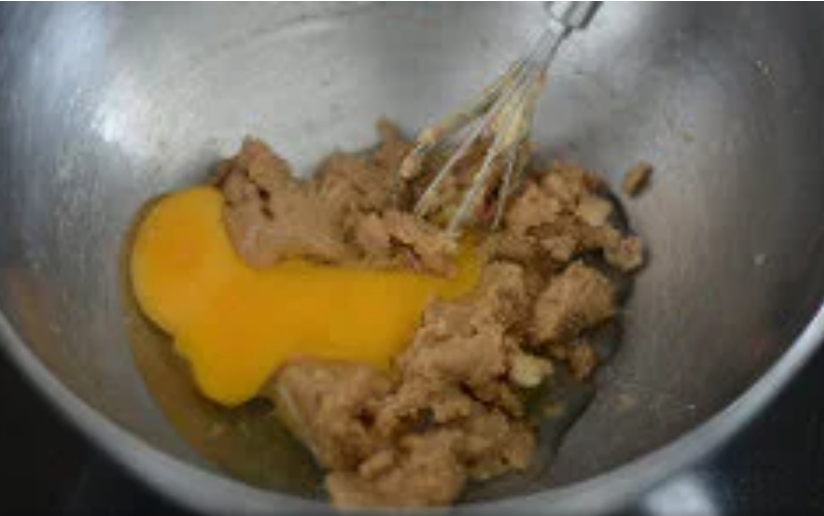
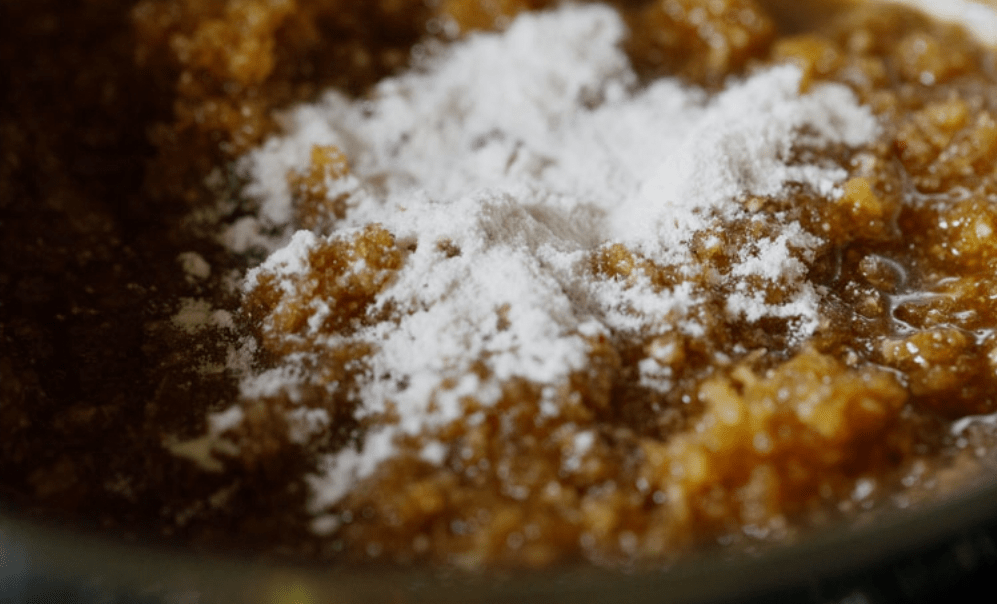
3 :- Then add 1 cup grated fresh coconut (100 grams) and 1 cup chopped jaggery (200 grams).

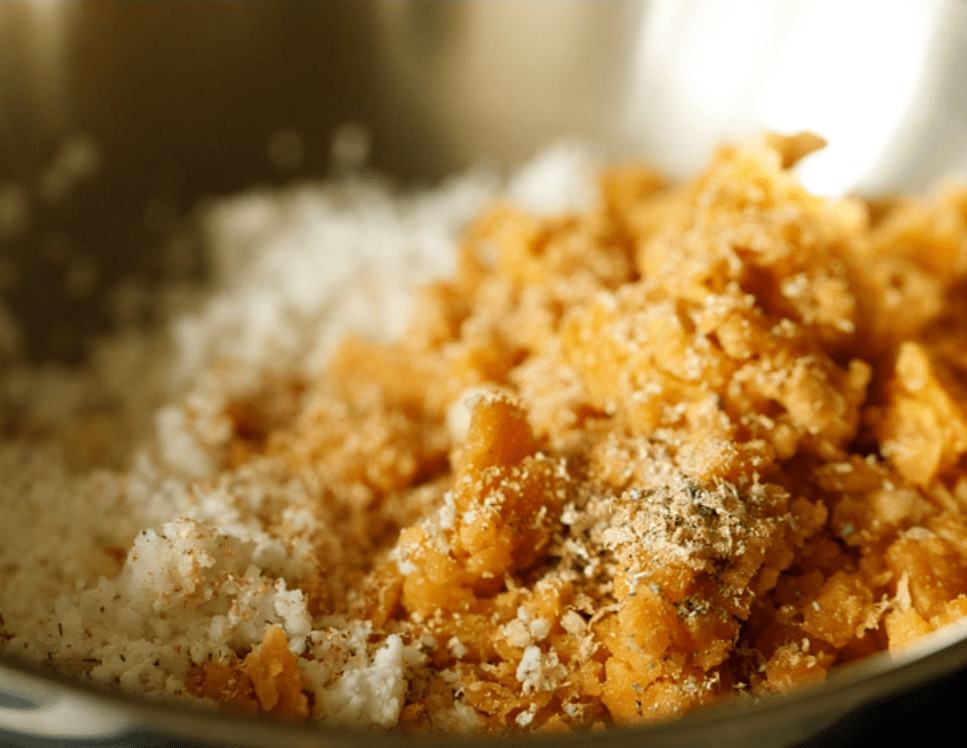
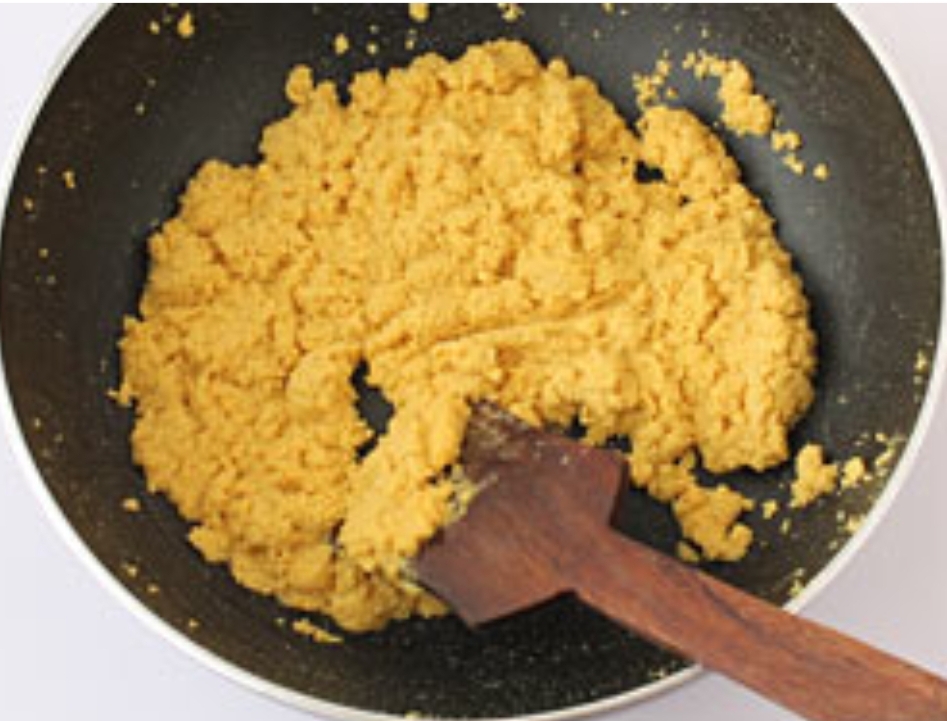
4 :- Mix well and cook this coconut-jaggery mixture on a low flame.

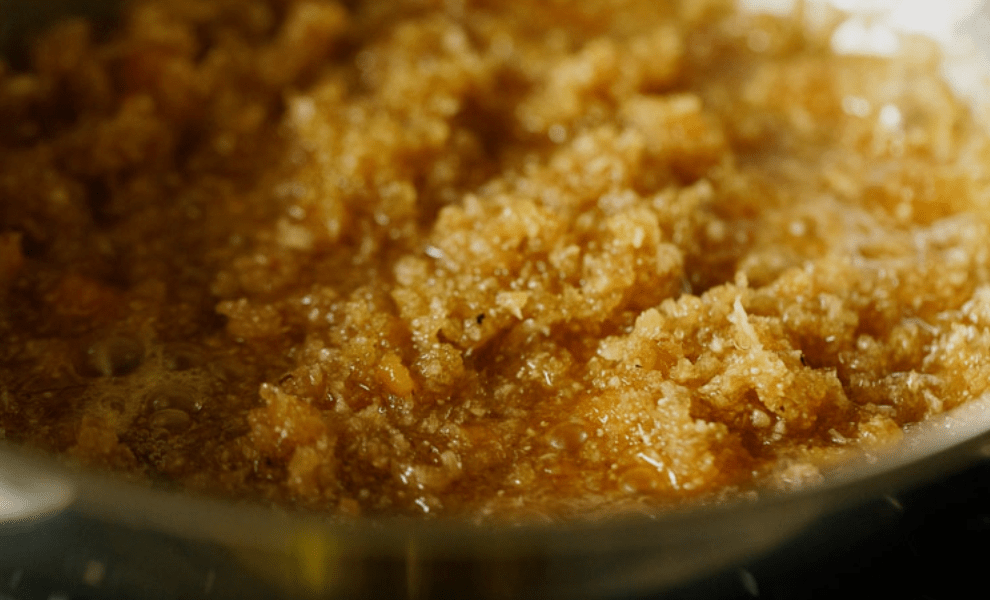
5 :- The jaggery will melt first. Cook on a low flame and stir often.

6 :- Stirring often cook this mixture till the moisture from the jaggery begins to dry – about 7 to 9 minutes. Switch off the flame.

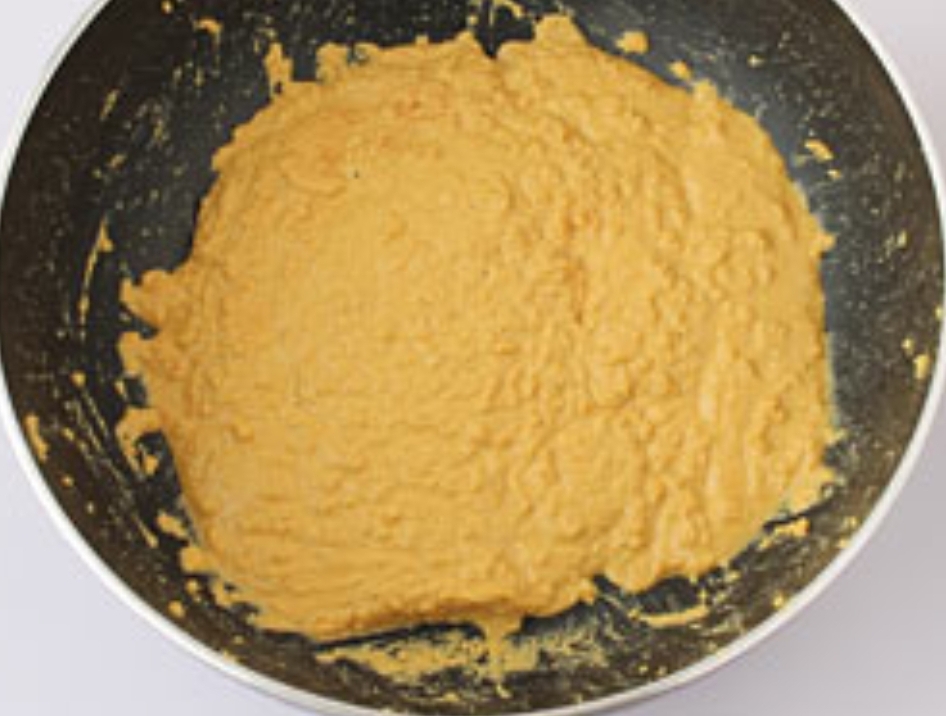
Don’t overcook as the jaggery then hardens. Keep this coconut-jaggery filling aside and let it cool completely. On cooling, the mixture will thicken more.

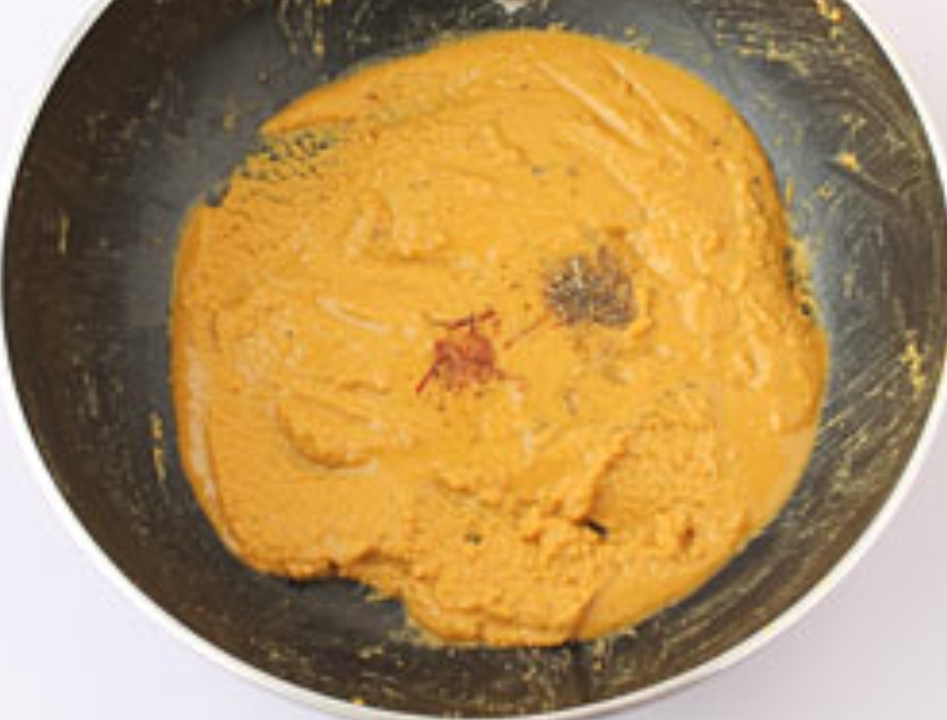
7 :- The following is an optional step. You can add 1 tablespoon rice flour to this mixture and mix well.

The rice flour helps to absorb moisture if any from the stuffing. Set the stuffing aside.

|| Make rice dough ||

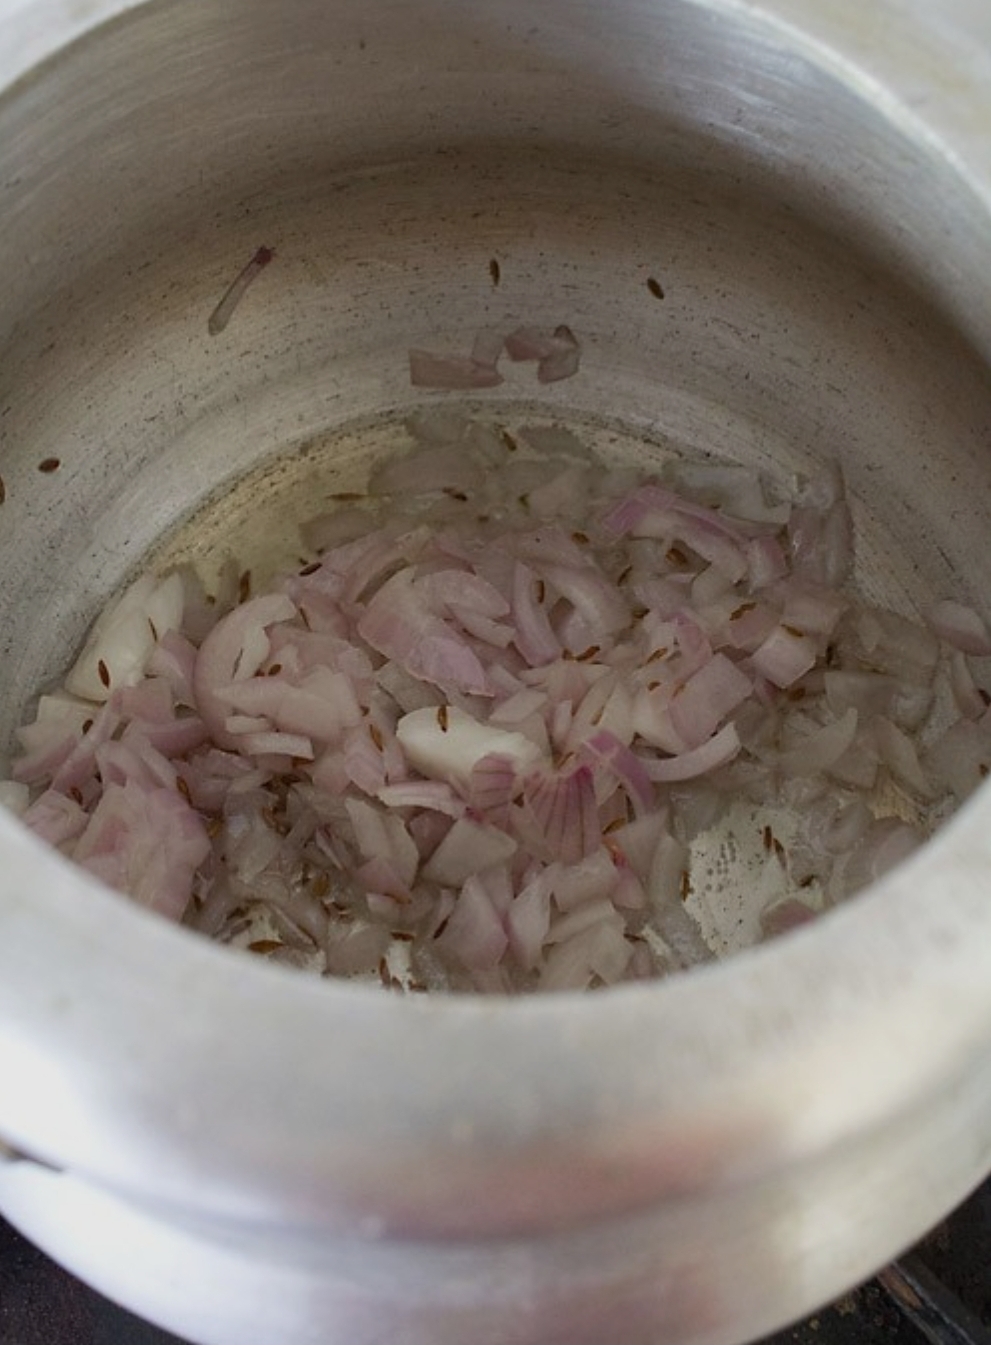
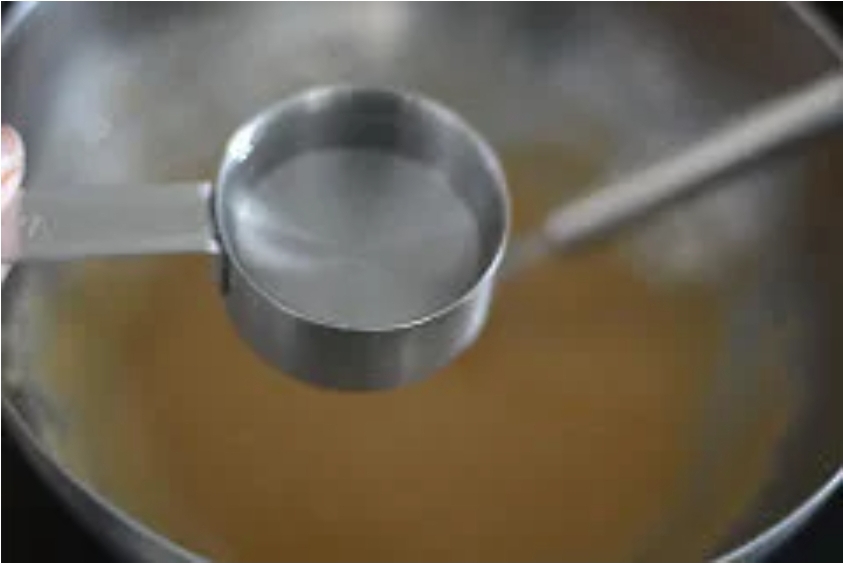
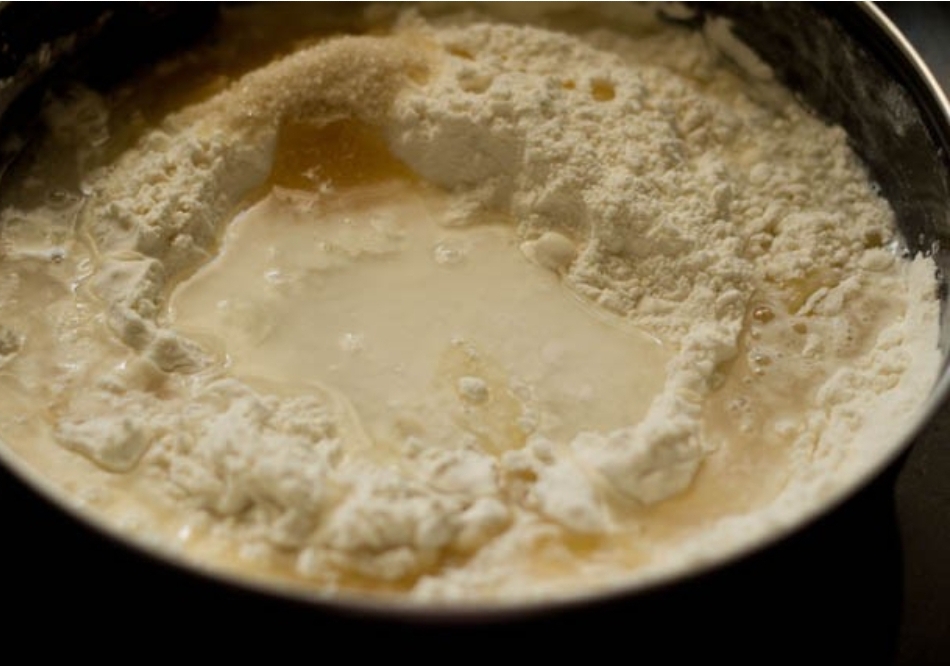
1 :- In a pan add 1.5 cups water, ¼ teaspoon oil or ghee and ¼ teaspoon salt. Keep it on the stovetop.

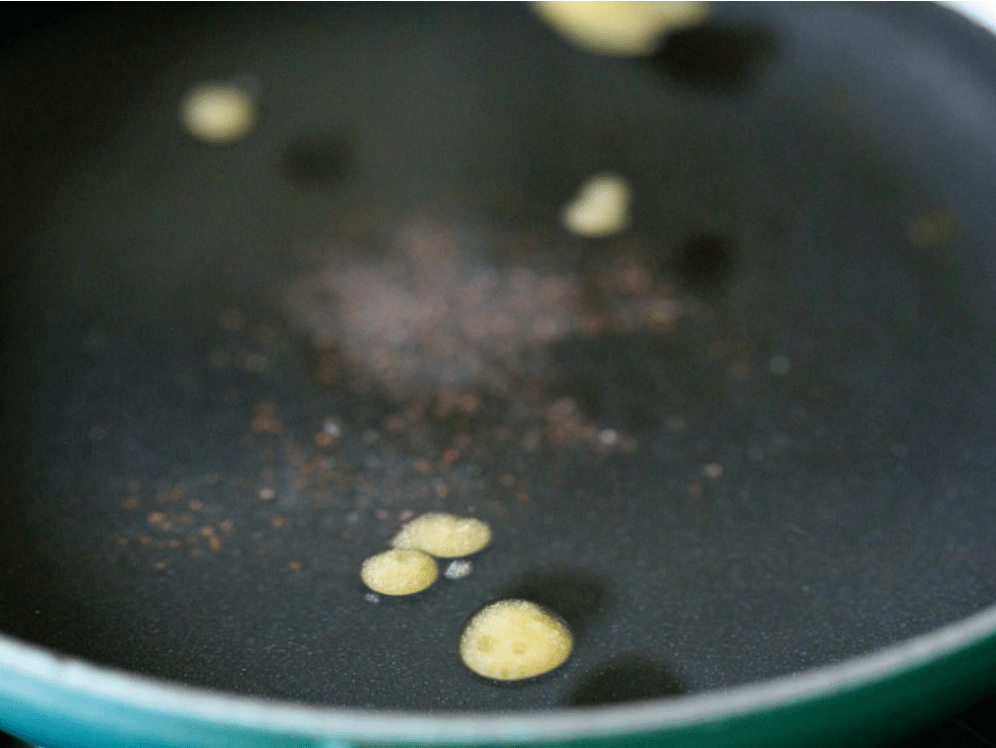
2 :- Let this mixture come to a boil.

3 :- Add 1 cup rice flour (150 grams). You can use homemade rice flour or packaged flour. Make sure the rice flour is fresh and within its shelf period.

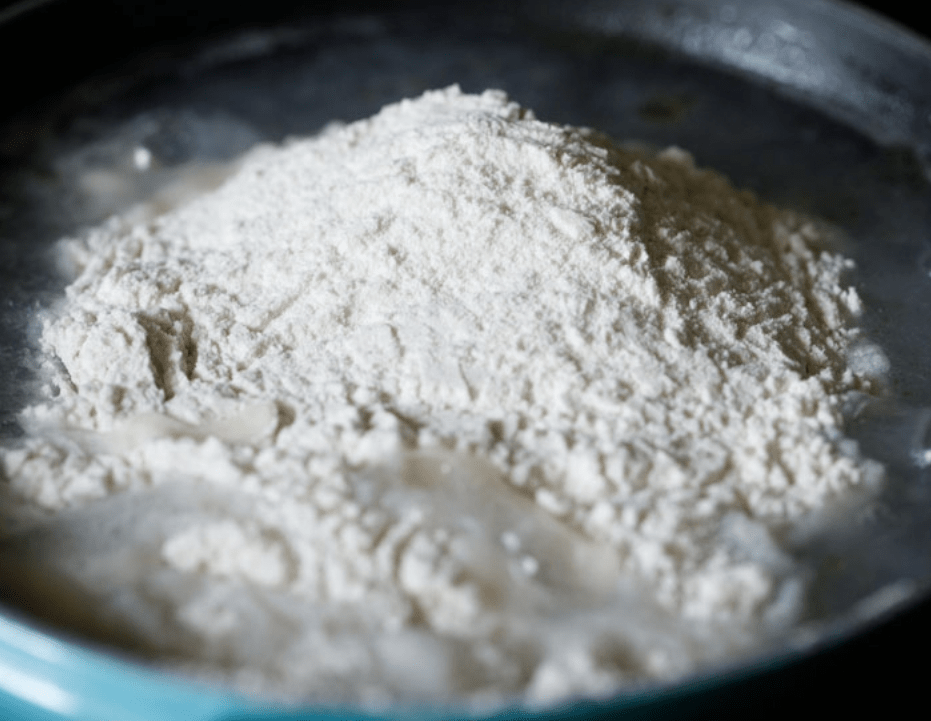
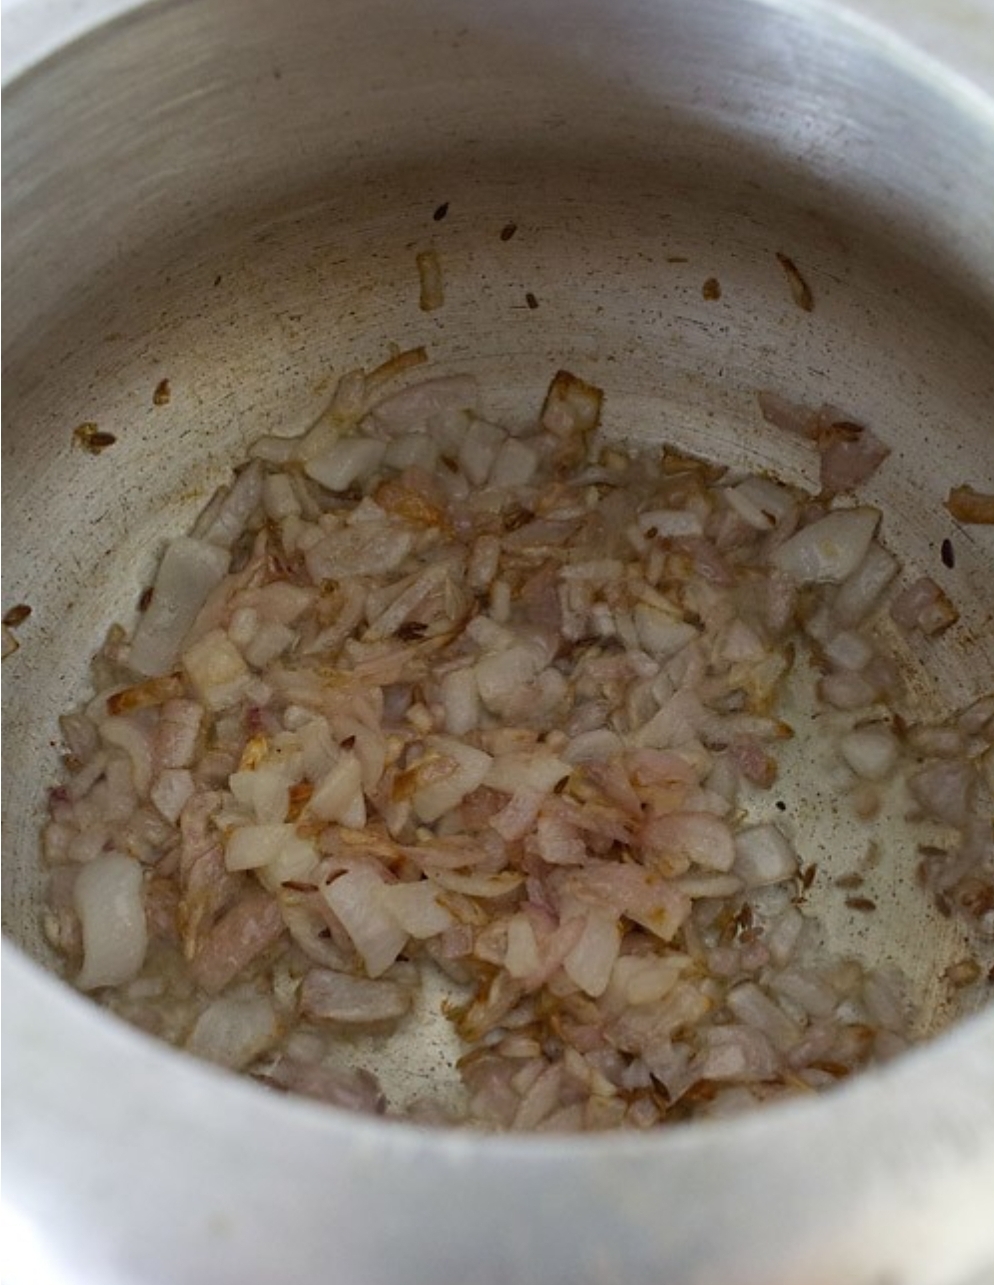
4 :- Quickly stir and mix the rice flour with the water.

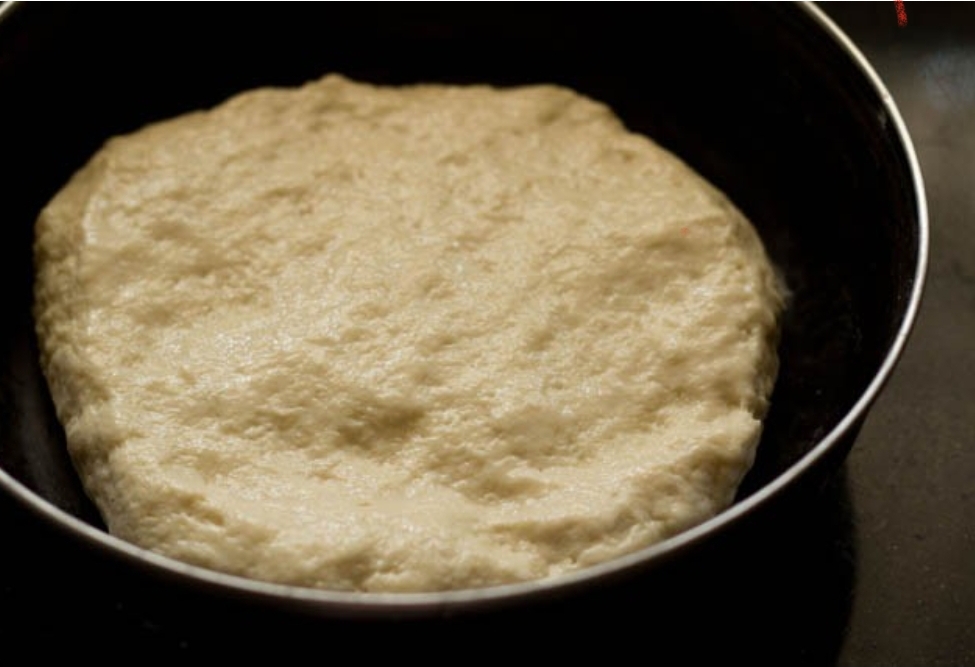
5 :- Stir till all the rice flour is mixed with the water. Switch off the flame. Remove the pan from the burner and keep on the workplace. Cover the pan with a lid for 4 to 5 minutes.

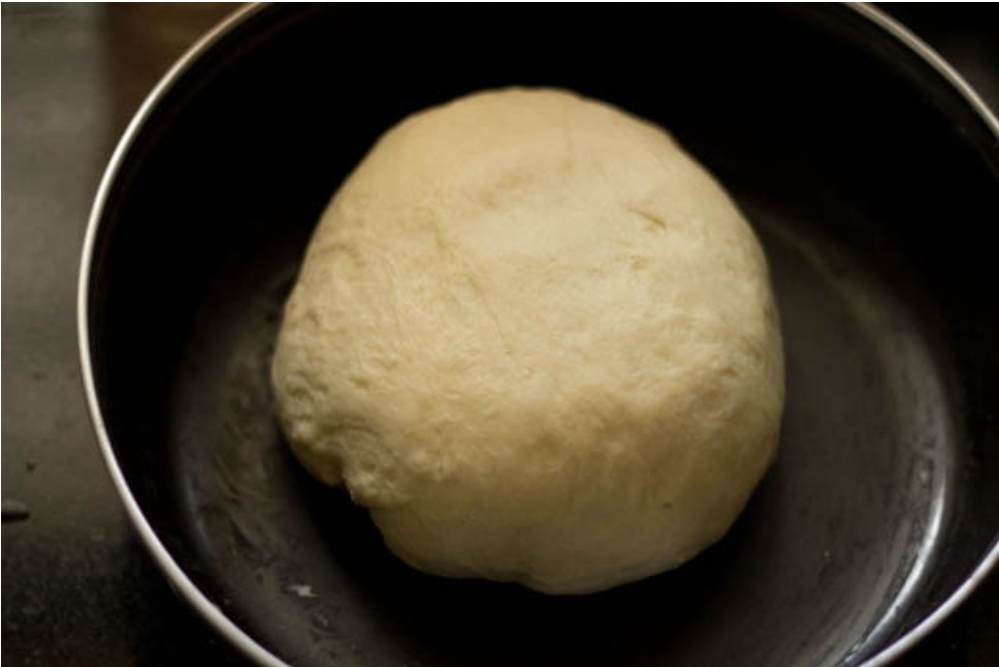
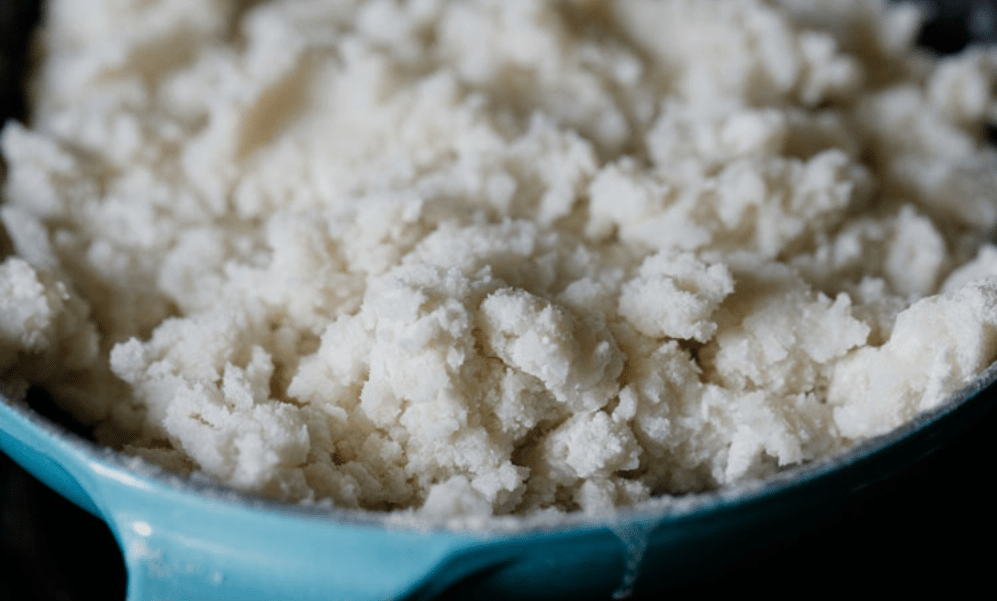
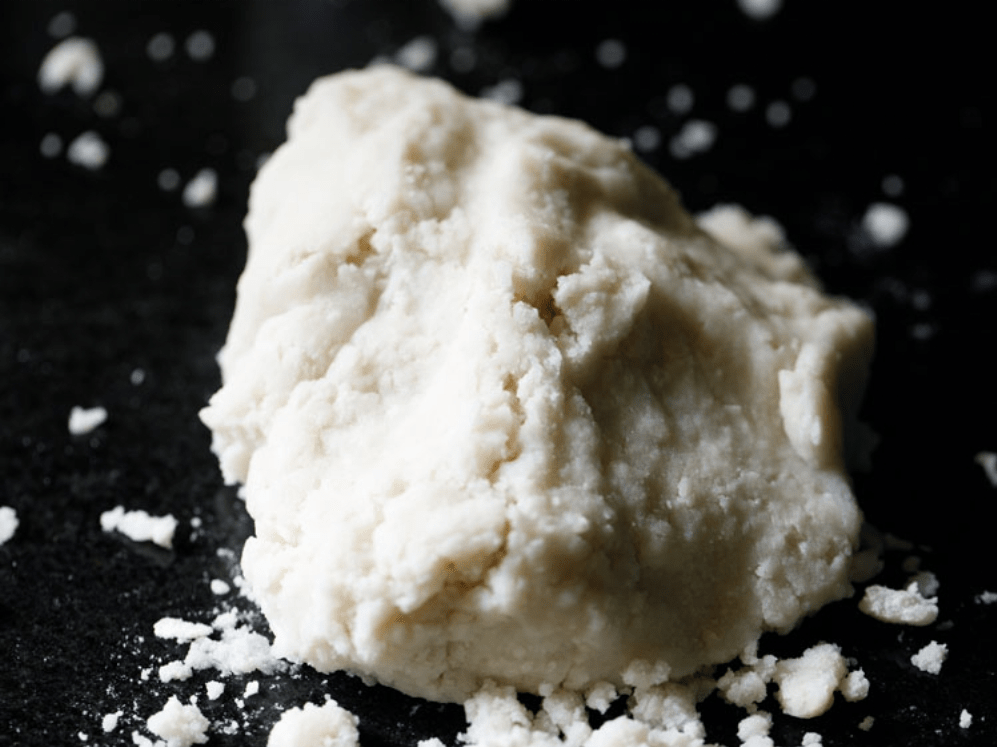
6 :- Now take all the dough in a plate or thali or in a bowl. Gather the dough together and begin to knead it.

The dough will be hot when you begin to knead. So apply some water on your palms and knead the dough. Knead the dough very well.

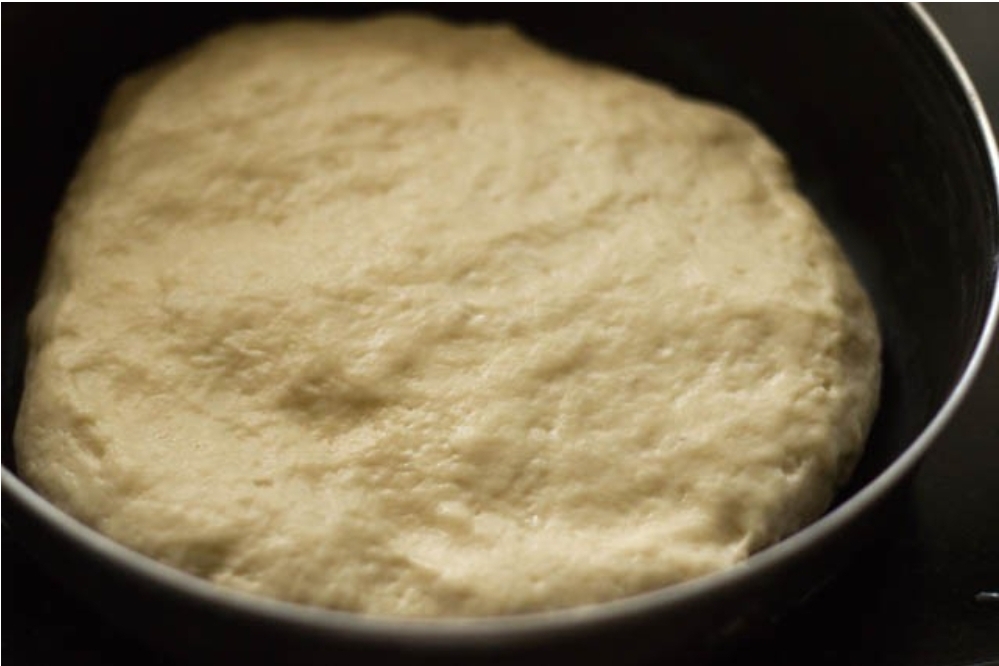
If you feel the dough looks dense or hard or dry, then just add a few teaspoons of warm water and continue to knead.

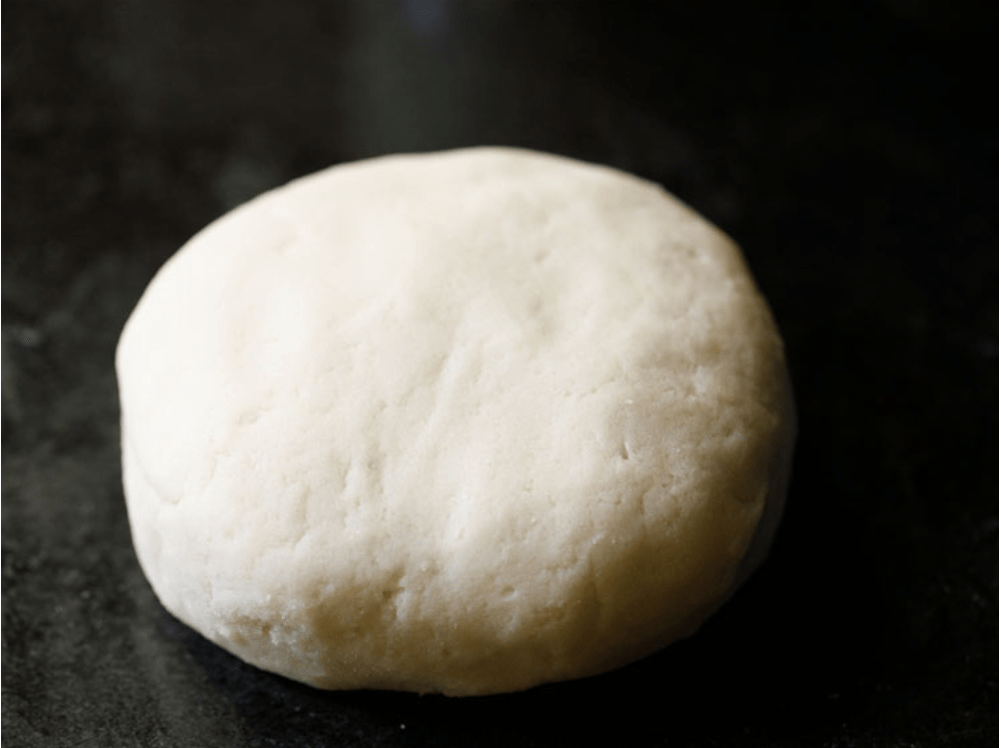
7 :- Knead to a smooth and soft dough without any lumps.

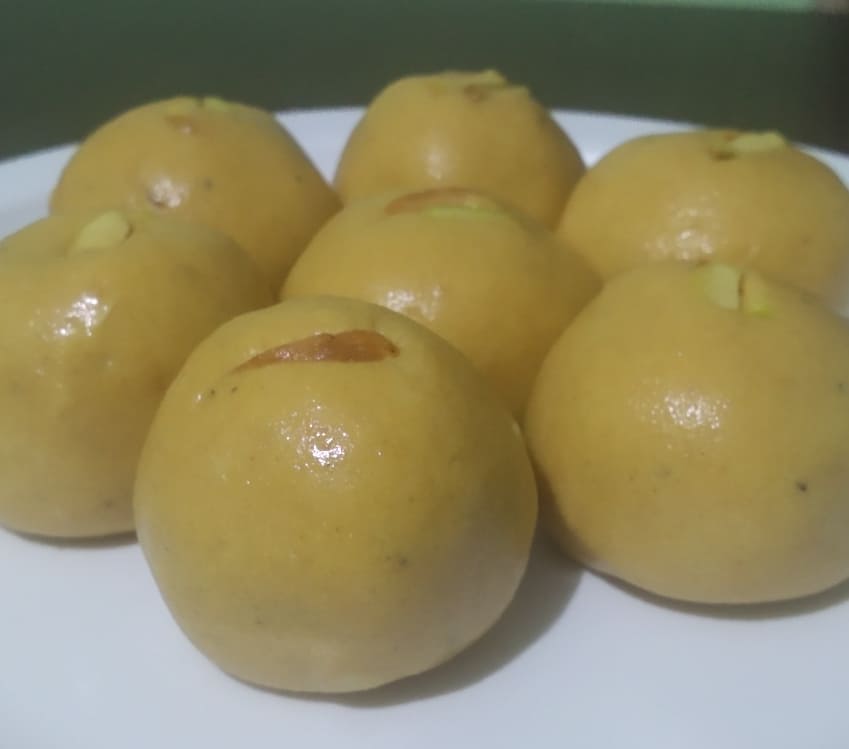
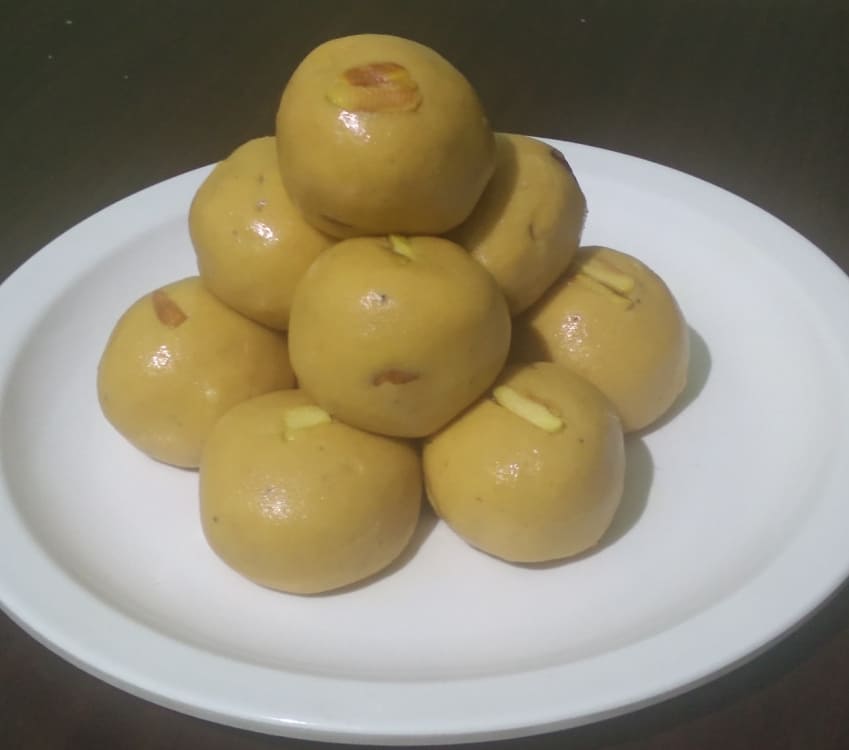
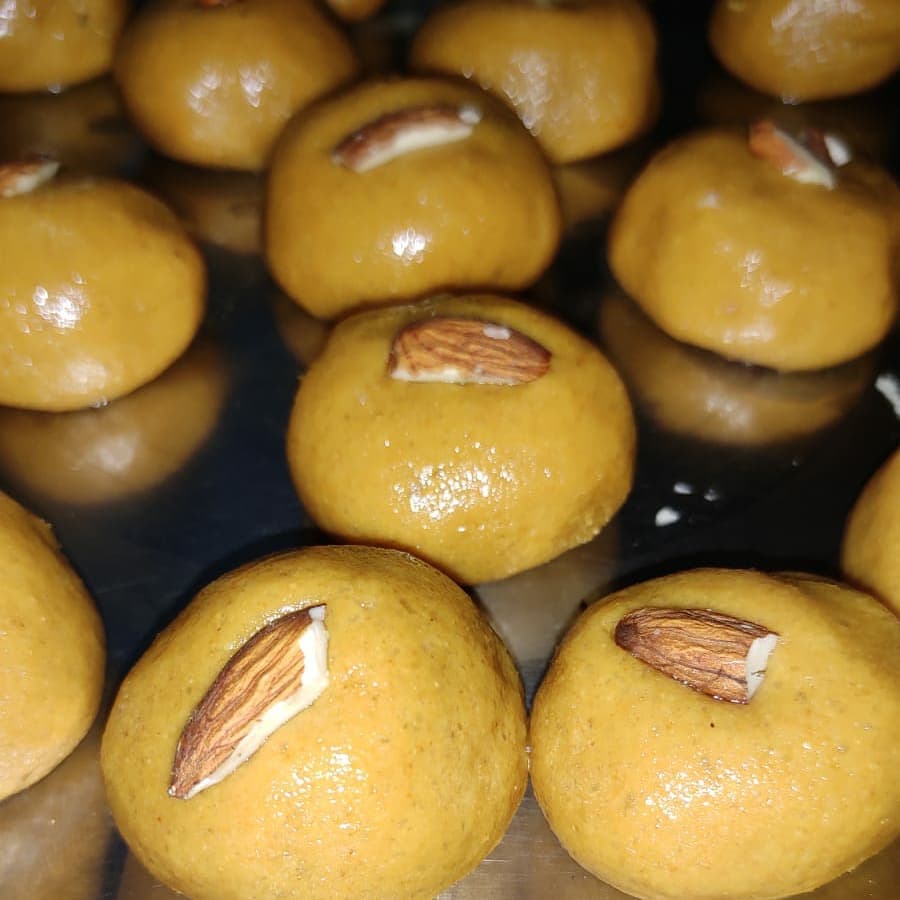
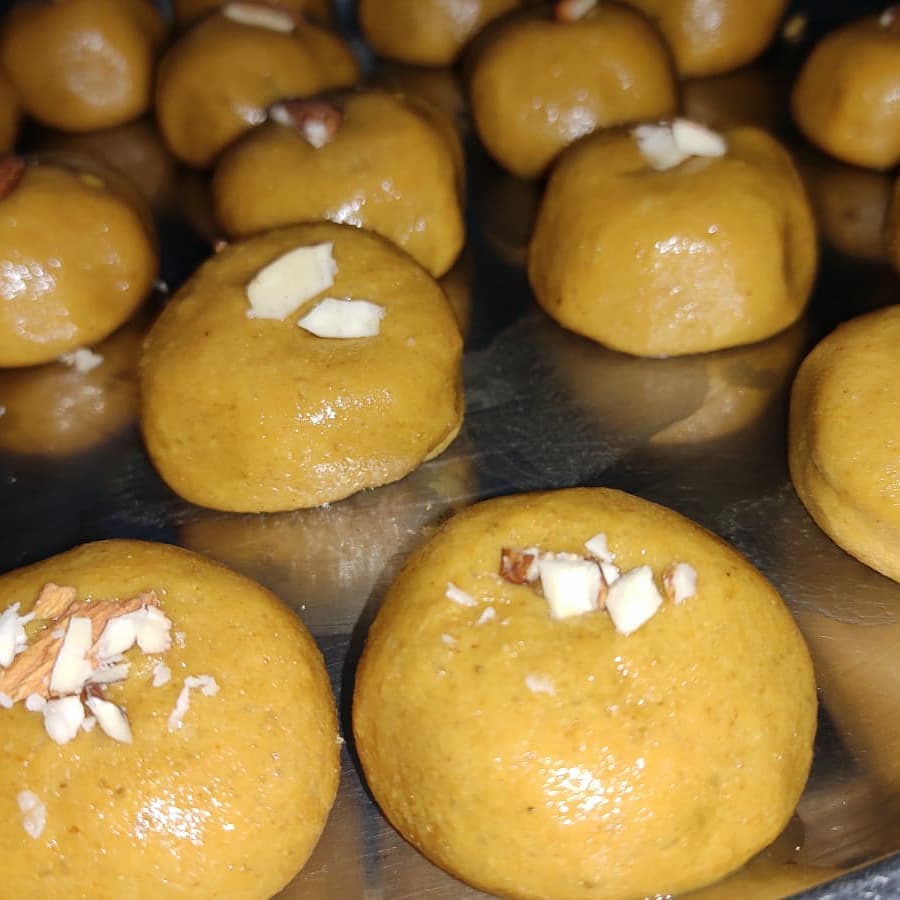
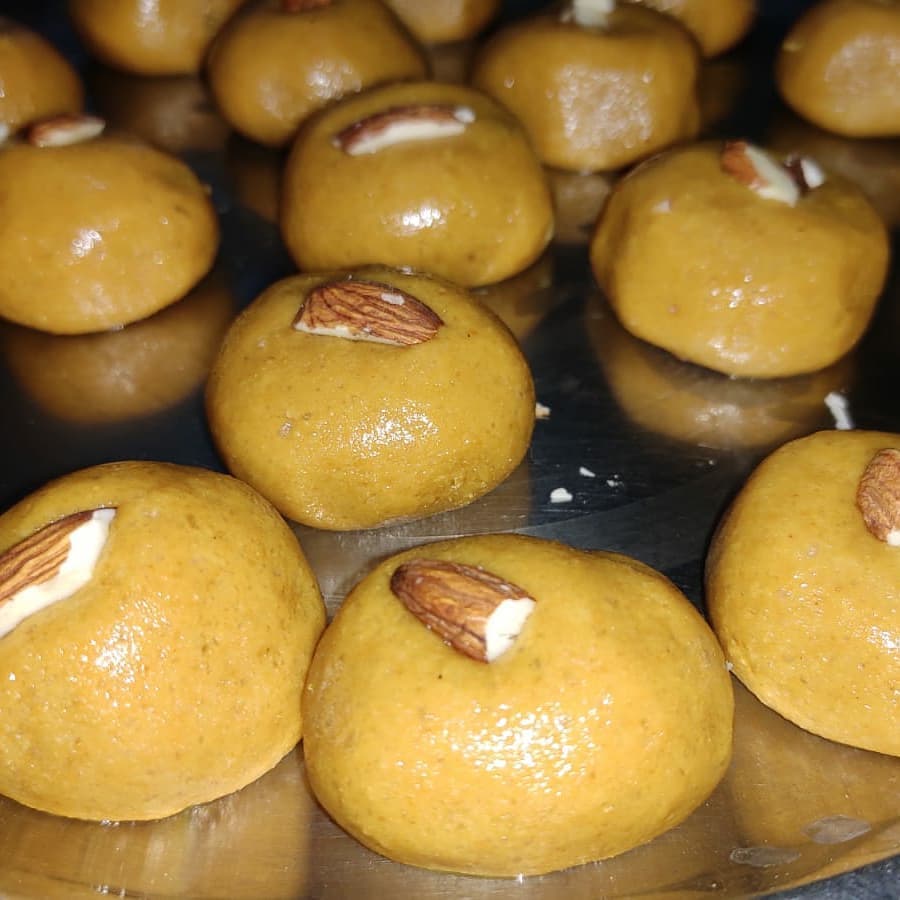
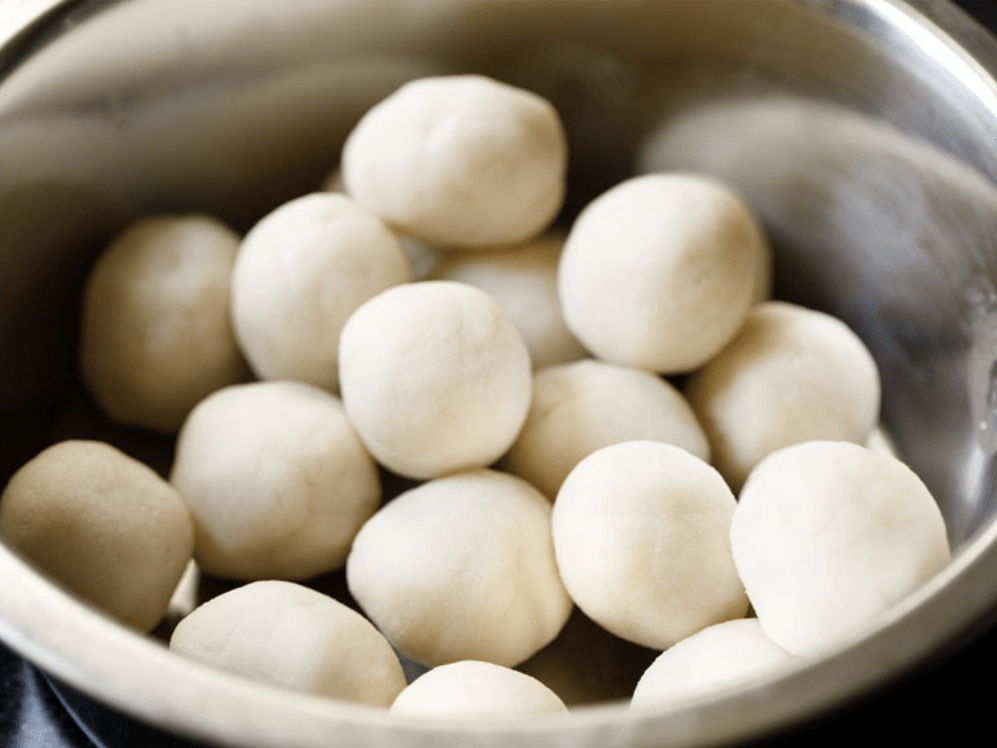
8 :- Make small balls from the dough. Roll the balls till smooth in your palms. You can also apply some water on your palms, while rolling the balls. Keep the balls covered with a kitchen towel. The balls should not have cracks. They should be smooth in appearance.

|| Shape modak without mould ||

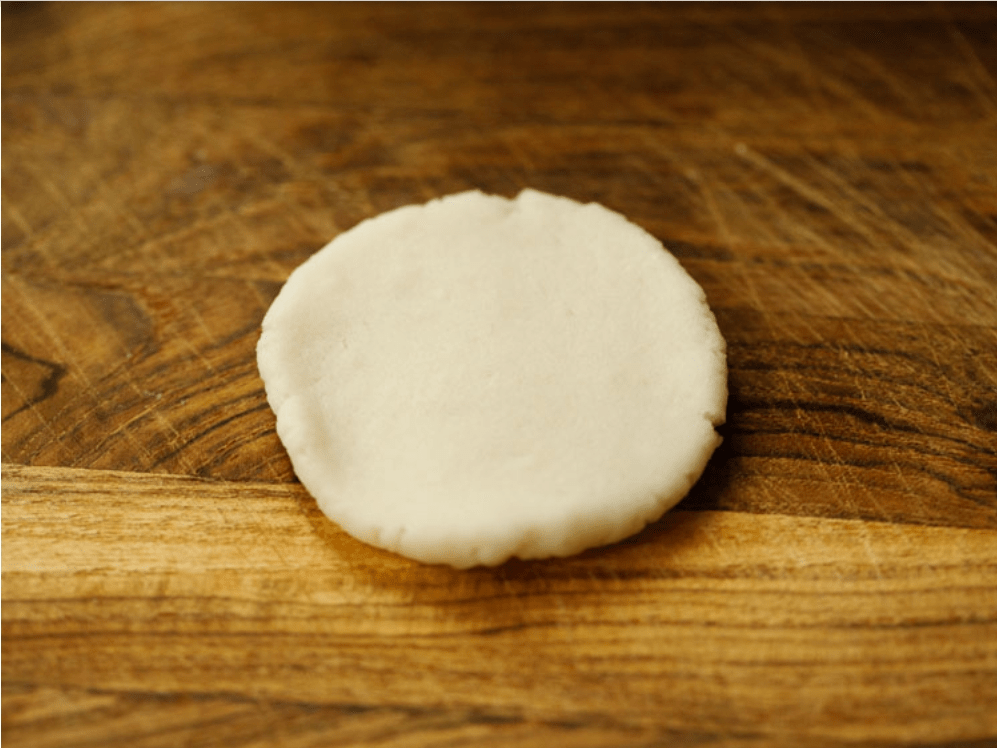
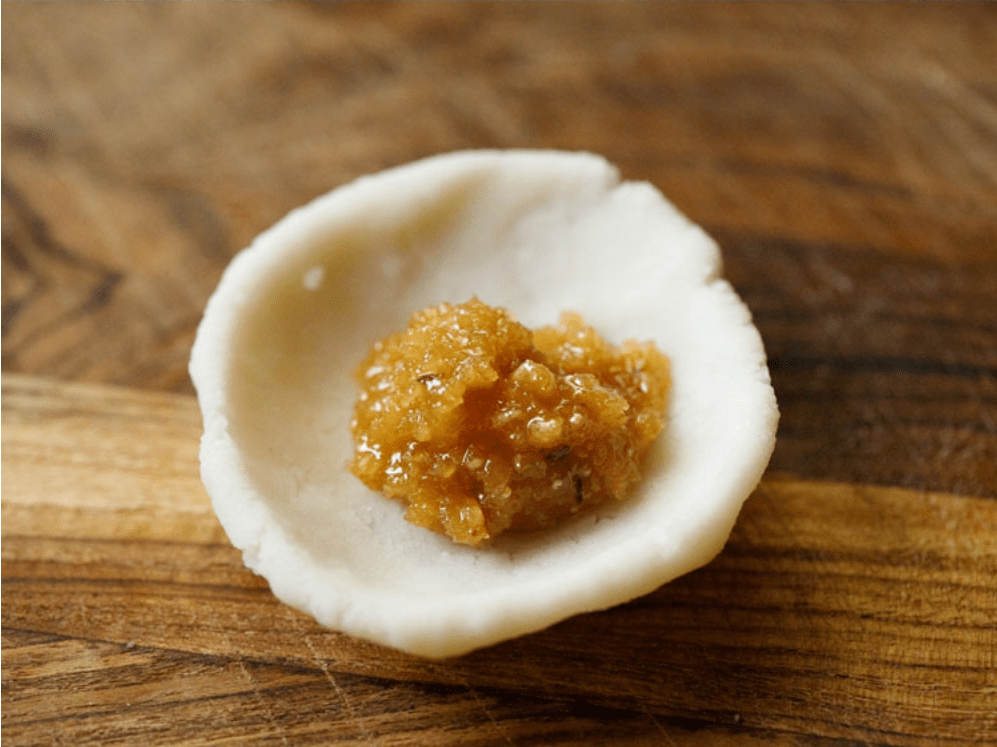
1 :- Take a ball and flatten it with your fingers or on your palms, to a round disc or a shallow bowl shape to a medium thickness.

You can apply ghee or oil in your palms, while flattening. You can keep the edges slightly thin and the center can be thick.

2 :- Place a few teaspoons of the prepared stuffing in the center.


3 :- Press the edges as shown in the pic below. You can also press the edges first and then place the stuffing.

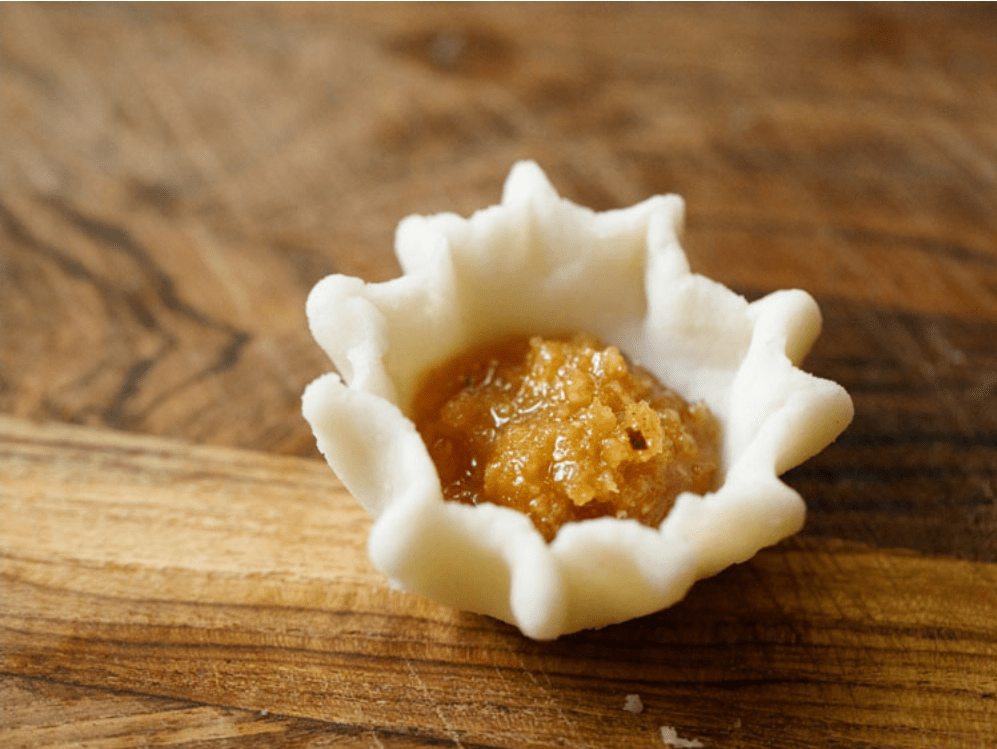
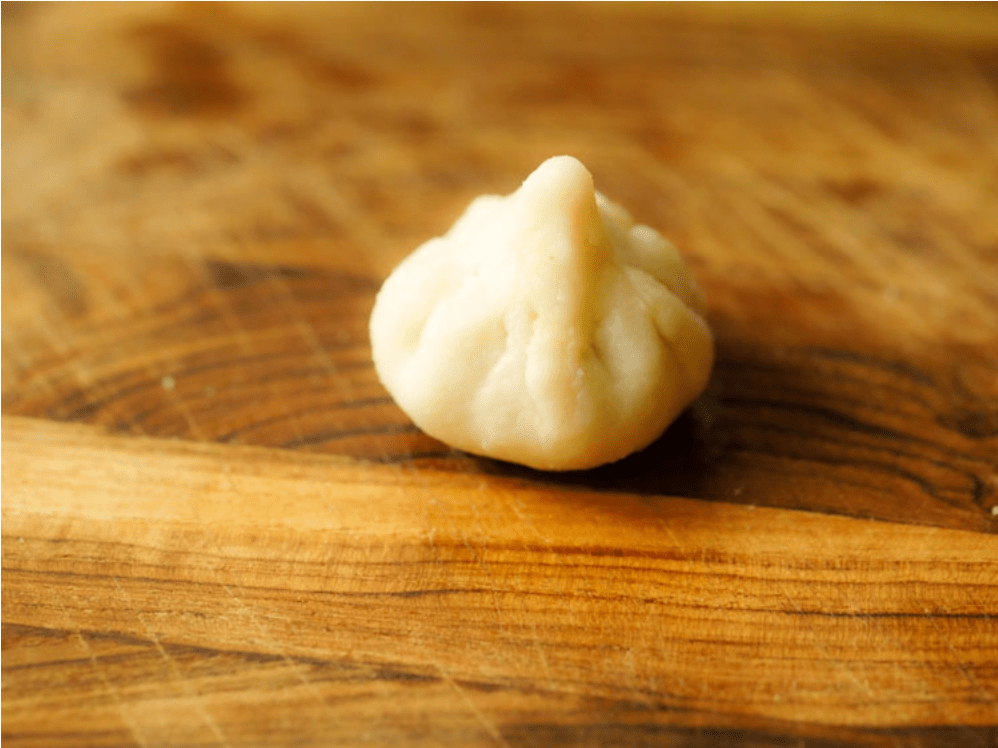
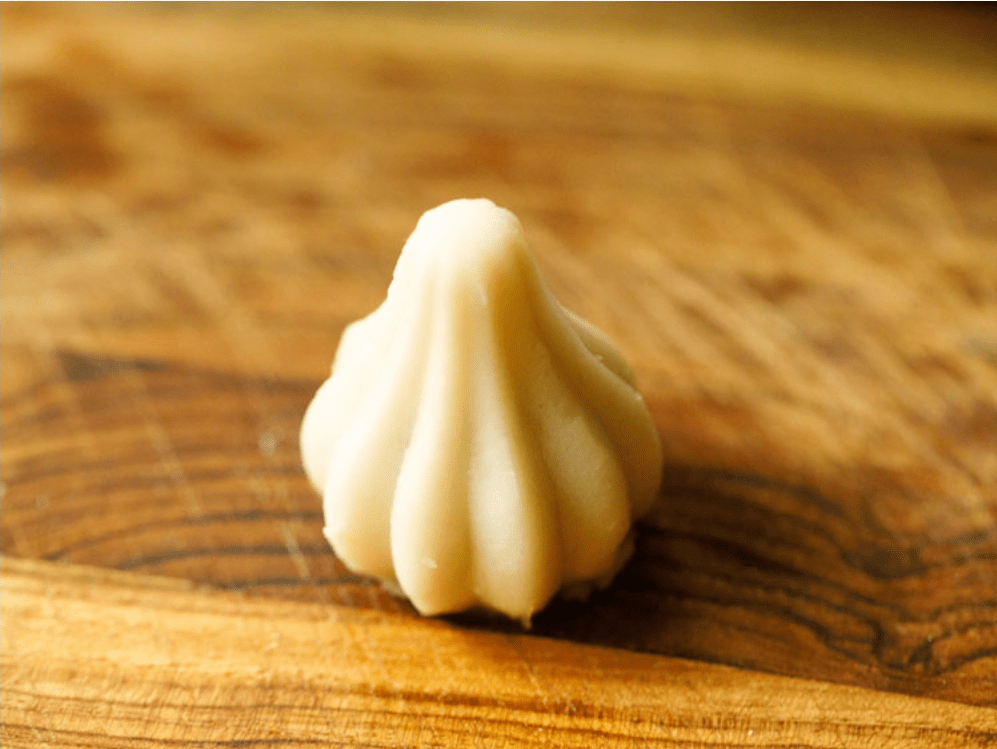
4 :- Bring together all the edges and join them. Remove the extra portion of the dough from the top, if any. Shape and taper the top of the modak with your fingers.

You can also use ready modak moulds. They are usually available in shops and market some days before the Ganesh Chaturthi festival.

|| Make modak with mould ||

1 :- Grease the modak mould with a bit of ghee or oil. Then close or lock the mould. Put the dough ball inside the mould and press it so that a space is made in the center. The rice dough will form a layer touching the walls of the mould.

2 :- Place the sweet stuffing.

3 :- Cover the bottom with a small piece of dough. Press and smoothen it sealing the modak.Cover the bottom with a small piece of dough. Press and smoothen it sealing the modak.

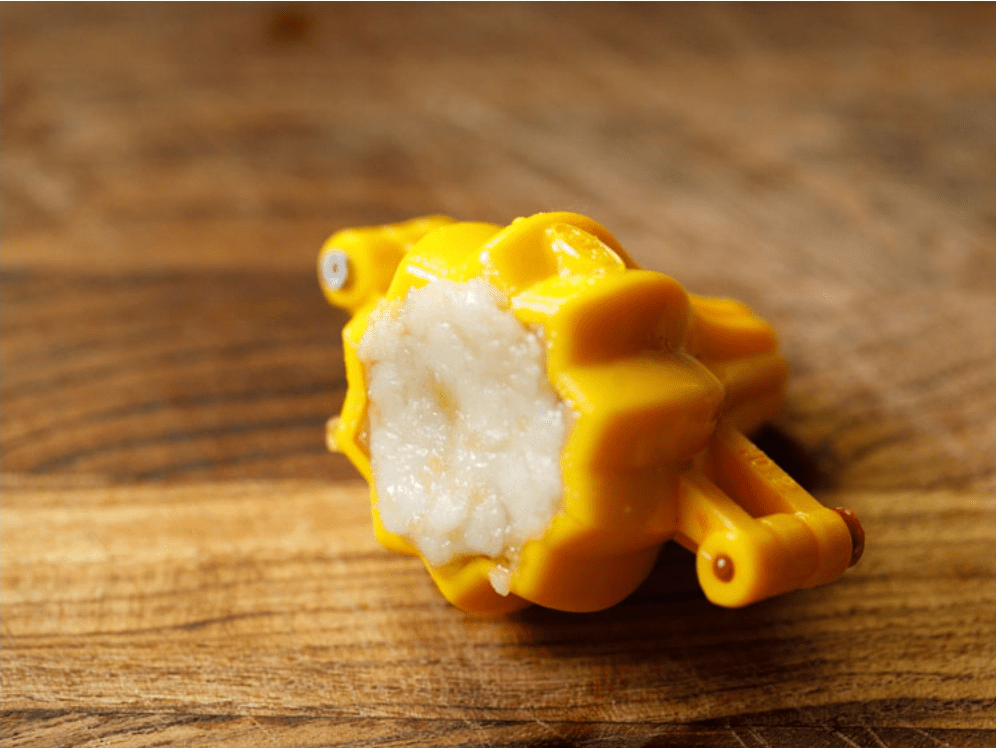
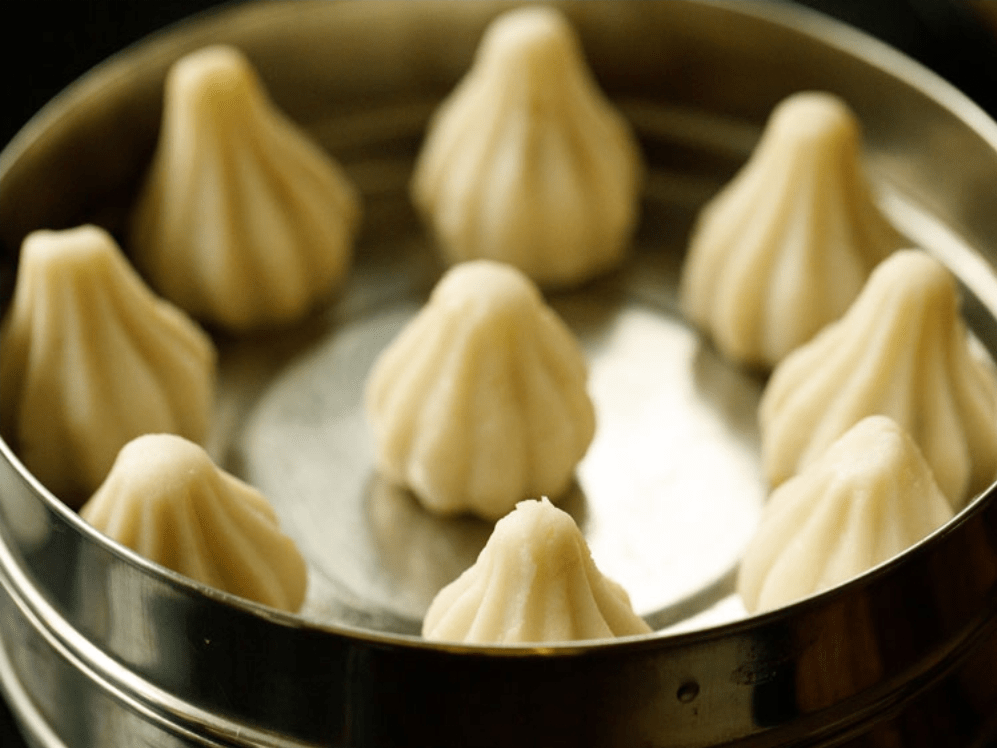
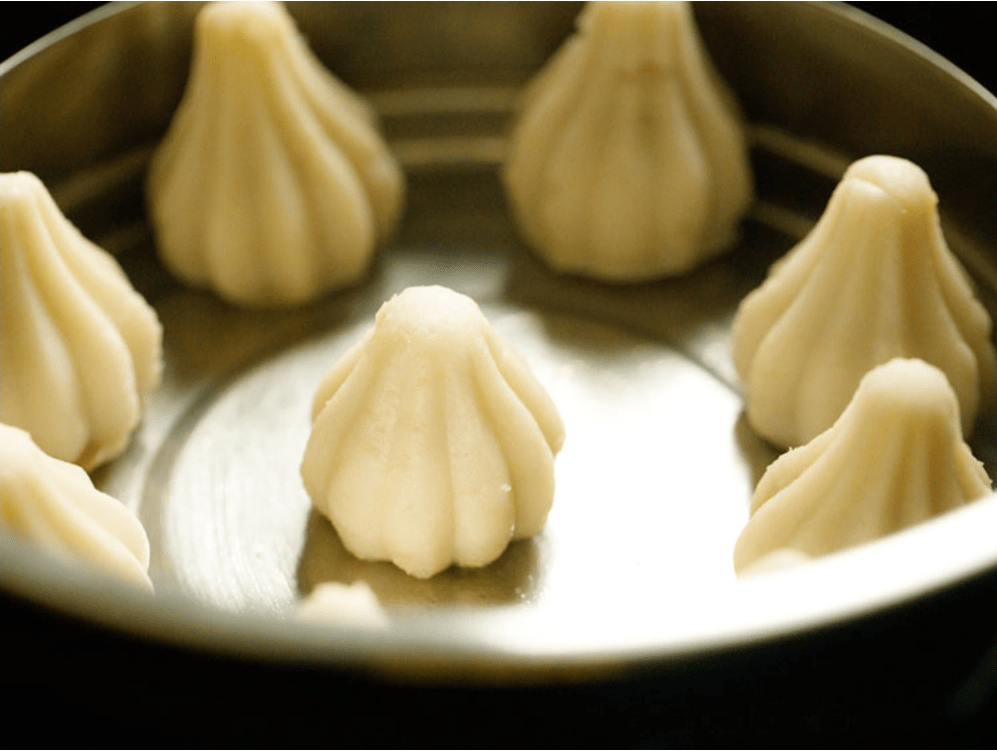
4 :- Open or unlock the modak mould. Remove the modak gently from the mould. Shape all modaks this way with mould. Keep the shaped modak covered with a napkin so that the rice dough does not dry out. 

5 :- Make all the modak this way. Brush or grease a pan with some oil or ghee. The pan can also be lined with banana leaves or turmeric leaves. Place the shaped modak in the greased pan with some space around them.

|| Steaming Modak ||

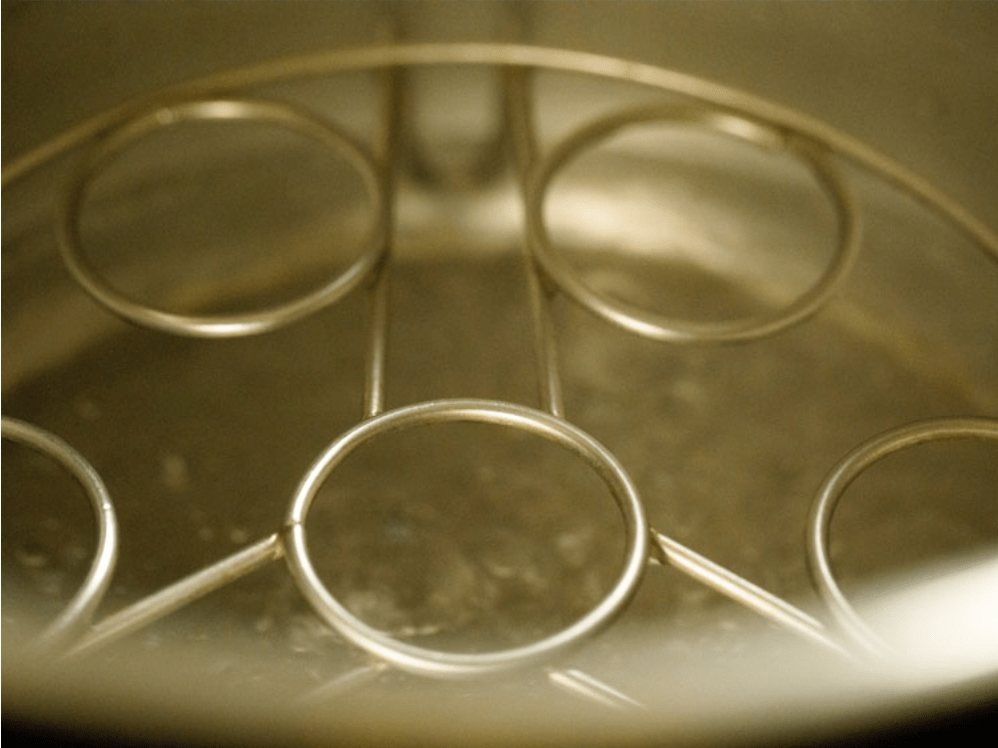
1 :- Take 2 to 2.5 cups water in a pot, pressure cooker or an Instant Pot steel insert. Place a trivet or a rack. Heat the water till starts to boil on a high flame. For instant pot, use the sauté option and let the water begin to boil.

2 :- I have stacked two pans for steaming 16 modak. But you can also steam the modak in separate batches. Just cover the shaped modak with a moist muslin or cotton napkin before you begin to steam.

3 :- Cover the pan and steam modak for 10 to 15 minutes on medium-low flame. On the Instant Pot, use the steam function on high for steaming and keep the steam vent in venting position so that the steam releases while steaming.

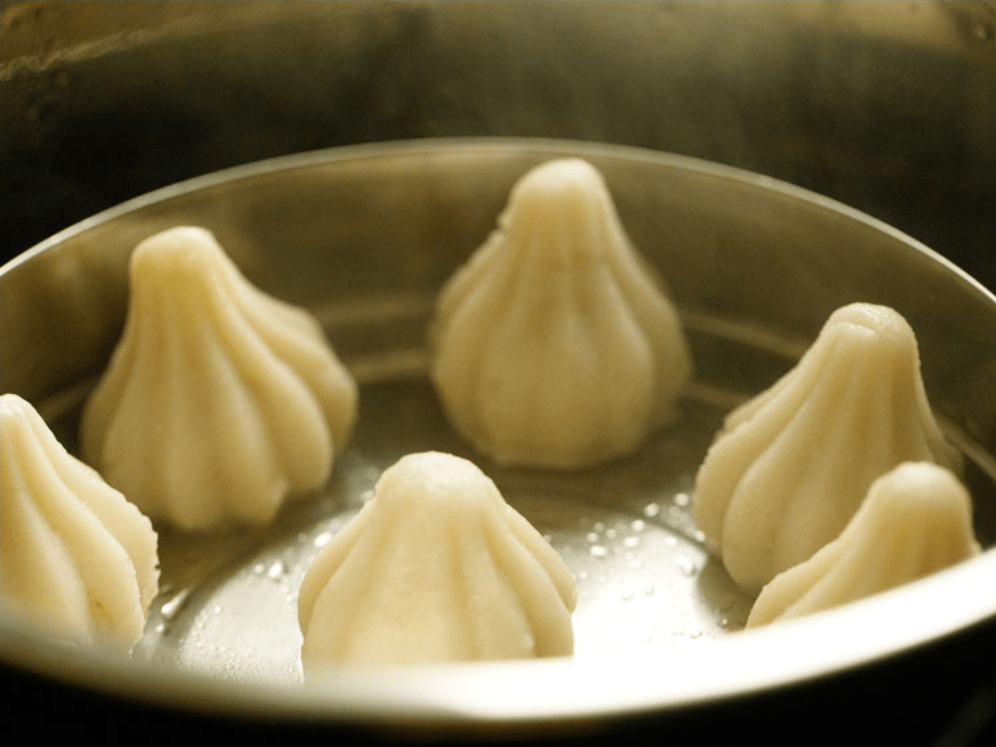
Use a stop watch to set the time to 10 or 12 minutes. Once the ukadiche modak are steamed, you can drizzle a few teaspoons of ghee on them.

Some modak may crack while shaping or steaming, but it is fine. You can forgive yourself if you are making modak for the first time.

4 :- The ukadiche modak are ready to be offered to Bhagwan Ganesha. Modak stay good for a couple of days in the refrigerator. While serving after refrigerating, steam them in a pan till warm or sprinkle some water on them and microwave till warm.

Expert Tips for Perfect Modak

  • Rice dough: While making modak recipe, the most trickiest part for many is to get the correct texture in the rice dough. If the dough is dry, you will find it difficult to shape and the resulting texture after steaming will be chewy and dense. The proportion of rice flour to water I use work perfectly for a smooth and soft dough. However do note that depending on the texture of rice flour, you may need to add a bit less or more water.
  • Stuffing: Overcooking the stuffing will result in the jaggery become hard and chewy. If this happens, then just sprinkle a few tablespoons of hot water in the mixture and stir well. The hot water will breakdown the hard consistency of the jaggery and make them soft. You can even sprinkle some water and cook the mixture on low heat until it softens.
  • Cracks in the dough: Less water will result in the dough being dry and having cracks. If you add more oil or ghee than this will result in the dough tearing when you shape it.
  • Flattening and Shaping: Do not flatten the dough too thin or too thick. A thin dough will tear while shaping and a thick dough will take more time to cook and does not taste pleasant.

Vegetarian
4.97 from 109 votes • 137 CommentsShares441Step by StepJump to Recipe

maa ki dal recipe | kaali dal | mah ki daal | black gram dal

Prep Time :- 10 mins

Cook Time :- 40 mins

Soaking Time :- 3 hrs

TotalTime :- 3 hrs 50 mins

Course :- daal

Cuisine :- punjabi

Servings :- 5 Servings

Calories :- 167 kcal

INGREDIENTS 

1x ✔️2x 3x

for pressure cooking:

  • ▢¾ cup black urad dal
  • ▢water (for soaking)
  • ▢3 cup water (for pressure cooking)
  • ▢1 tsp ghee / clarified butter

other ingredients:

  • ▢2 tbsp ghee / clarified butter
  • ▢1 bay leaf
  • ▢1 tsp cumin / jeera
  • ▢1 tsp kasuri methi
  • ▢1 onion (finely chopped)
  • ▢1 tsp ginger garlic paste
  • ▢1 chilli (slit)
  • ▢¼ tsp turmeric
  • ▢¾ tsp kashmiri red chilli powder
  • ▢½ tsp coriander powder
  • ▢¼ tsp cumin powder
  • ▢¼ tsp garam masala
  • ▢1 tsp salt
  • ▢2 tomato (finely chopped)
  • ▢1 cup water
  • ▢2 tbsp coriander (finely chopped)

INSTRUCTIONS 

  • 1 :- firstly, in a large bowl take ¾ cup black urad dal and soak in enough water for 3 hours.

2 :- drain off the water and transfer to a pressure cooker.

3 :- add 3 cup water and 1 tsp ghee.

4 :- cover and pressure cook for 5 whistles or until dal is cooked well. keep aside.

5 :- in a large kadai, heat 2 tbsp ghee and saute 1 bay leaf, 1 tsp cumin and 1 tsp kasuri methi.

6 :- add 1 onion, 1 tsp ginger garlic paste and 1 chilli

7 :- saute well making sure onions turn golden brown,

8 :- keeping the flame on low, add ¼ tsp turmeric, ¾ tsp chilli powder, ½ tsp coriander powder, ¼ tsp cumin powder, ¼ tsp garam masala and 1 tsp salt.

9 :- saute on low flame, until spices turn aromatic.

10 :- further, add 2 tomato and saute until tomatoes turn soft and mushy.

11 :- add in pressure cooked dal and mix well.

12 :- also, add 1 cup water or as required adjusting consistency as desired.

13 :- cover and simmer for 10 minutes or until flavours are absorbed.

14 :- now add 2 tbsp coriander and mix well.

15 :- finally, enjoy ma ki dal recipe with roti or rice.

NUTRITION

Calories: 167kcal

Carbohydrates: 21g

Protein: 8g

Fat: 6g

Saturated Fat: 3g

Cholesterol: 14mg

Sodium: 531mg

Potassium: 221mg

Fiber: 7g

Sugar: 3g

Vitamin A: 855IU

Vitamin C: 27mg Calcium: 46mg Iron: 3mg

notes:

  • firstly, if serving dal with roti then make slightly thick dal.
  • also, adjust the amount of spice depending on the spice level.
  • additionally, if you reduce the soaking time then you may have to increase the pressure cooking time.
  • finally, ma ki dal recipe tastes great when slow-cooked

Thanks 🐣

Pressure Cooker Chocolate Cake Recipe !!

A few things to remember:

  • Do not use water in the pressure cooker
  • Do not use the gasket (the rubber ring around the rim of the lid of your pressure cooker)
  • Always place a plate or stand at the bottom of the pressure cooker to make sure heat is spread evenly while cooking
  • Keep flame to a simmer so that the cooker doesn’t heat up too much
  • Always be super careful when using your pressure cooker to make a cake.
  • This is obviously not the intended purpose of a cooker and it can result in injury or worse if you don’t follow the instructions carefully.

Author: Beyond Eating

 Prep Time: 15 mins 

Cook Time: 45 mins 

Total Time: 1 hour

 Yield: 6” Cake 1x 

Category: Cake

 Cuisine: International

Description

Make a delicious and spongy chocolate cake in a pressure cooker. This cake recipe needs to oven or microwave to prepare.

Ingredients

SCALE 1x ✔️ 2x 3x

  • 3/4 cup of plain flour
  • 3/4 tsp of baking soda (soda bi carb)
  • 1/4 tsp of salt
  • 3 tbsp of cocoa powder
  • 3 tbsp of butter, softened at room temperature
  • 1/2 cup of sugar
  • 1 egg
  • 1/4 cup of water
  • 1/4 cup of milk
  • 1/2 tsp of vinegar or lemon juice
  • 1/2 tsp of vanilla extract

Instructions

1:- In a bowl, whisk the flour, salt and baking soda together until well combined

2 :- Set aside until needed

3 :- In another bowl, cream the butter and sugar with a whisk until it comes together. You don’t need an electric beater, just do this step by hand until the butter and sugar are well incorporated

4 :- Add the egg to this and beat again well until the mixture is a bit fluffy

5 :- Now add water and cocoa to this and mix well until the cocoa powder has fully blended in

6 :- Add the vinegar or lemon juice and the vanilla, mix again

7 :- Add milk and mix gently again

8 :- Now add the flour mixture in two additions, folding gently after each addition. Do not overmix at this stage, just mix until you don’t see any traces of flour remaining and the batter is lump free (small lumps should be okay, they will disappear on baking)

9 :- Grease a small 6″ cake pan with butter and pour the batter in

10 :- Tap the cake pan firmly on the kitchen counter a couple of times to remove any air bubbles in the batter

11 :- Preheat the pressure cooker by placing the plate or tray at the bottom of the pressure pan and closing the lid (no water needed, no gasket needed on the lid)

12 :- Heat on medium flame for about 2 minutes until the cooker is hot

13 :- Gently lower the cake pan with a pot holder into the pressure pan

14 :- Close the lid and keep the flame very low (simmer)

15 :- Cook for about 45-50 minutes until the a toothpick inserted into the cake comes out clean. The cake will also leave the sides of the pan, which is a good indication that it’s cooked

16 :- Remove from inside the cooker and cool for 10 minutes in the cake pan

17 :- Then, gently invert onto a cooling rack or plate and cool the cake completely before cutting and serving

18 :- You can also use this cake as a base and frost it, make multiple layers, etc

Tag @beyond__eating on Instagram and hashtag it #beyondeatingrecipes

Step by Step Pictures for Making a Cooker Cake (No-Oven Cake)

In a bowl, whisk the flour, salt and baking soda together until well combined

Place the butter and sugars in another dry bowl
Beat well with a whisk until it comes together. You can use an electric beater but it’s not necessary to use one
Add the egg
Beat well again until the mixture turns a bit fluffy
Now add water
and cocoa powder
Beat well making sure there are no lumps. You can sift the chocolate if needed, this makes the mixing a lot easier
Next, add the milk and beat again until well combined. Follow with the vinegar (or lemon juice) and vanilla. Beat again.
Now add half the flour mixture, fold until you don’t see any more streaks of flour, add the remaining flour, and fold again. Do not over mix at this stage.
The batter is now ready
Pour into a buttered 6″ cake pan
Tap the pan firmly on the kitchen counter to remove any air bubbles in the batter.
Prepare the pressure cooker by placing a plate or pot stand at the bottom of the pressure pan. Close the lid and heat on medium flame for 2 minutes until the pressure cooker is nicely heated up.
Gently insert the cake pan and close the lid again
Cook on very low flame for about 45-50 minutes or until a toothpick inserted into the cake comes out with no wet crumbs
Decorate the cake as your wish and choice

Invert onto a plate or rack and cool completely before cutting and serving. You can also frost the cake before cutting.

Making a cake without an oven in a pressure cookeris really a simple procedure and if you follow the steps closely, I guarantee a soft and spongy chocolate cake. If you try this recipe, please leave a comment to let me know. You can easily double the recipe for a larger cake, just use an 8″ or 9″ cake pan if that’s the case and make sure your pressure cooker is large enough to hold it. You can also bake this cake in an oven, check if it’s done in about 30-40 minutes since baking times will vary.

Thanks !!

BEYOND EATING

https://instagram.com/beyond__eating?utm_medium=copy_link

वेज मोमोज रेसिपी | veg momos in hindi | मोमोज बनाने की रेसिपी

 तैयारी का समय :10 MINUTES 

पकाने का समय :25 MINUTES 

कुल समय :35 MINUTES 

कितने लोगों के लिए: 12 सर्विंग्स 

AUTHOR: Beyond Eating

कोर्स :- भारतीय स्ट्रीट फूड 

पाक शैली :- नेपाली 

कीवर्ड :- वेज मोमोज रेसिपी

सामग्री

आटा के लिए:

  • ▢1½ कप मैदा
  • ▢½ टी स्पून नमक
  • ▢सानने के लिए पानी
  • ▢तेल (ग्रीस के लिए)

स्टफ़िंग के लिए:

  • ▢3 टी स्पून तेल
  • ▢3 लहसुन (बारीक कटी हुई)
  • ▢1 इंच अदरक (बारीक कटी हुई)
  • ▢2 मिर्च (बारीक कटी हुई)
  • ▢4 टेबल स्पून हरा प्याज
  • ▢1 कप गाजर (ग्रेट किया हुआ)
  • ▢2 कप गोभी (कटा हुआ)
  • ▢½ टी स्पून काली मिर्च (कुचला हुआ)
  • ▢½ टी स्पून नमक

अनुदेश

1 :- सबसे पहले, एक बड़े मिक्सिंग बाउल में 1½ कप मैदा और ½ टीस्पून नमक लें/-

2 :- पानी डालें और कम से कम 5 मिनट के लिए आटा गूंधें/-

3 :- आवश्यकतानुसार पानी डाल के एक स्मूथ और मुलायम आटा गूंधे/-

4 :- तेल के साथ आटे को ग्रीस करें और 30 मिनट के लिए एक तरफ रख दें/-

5 :- अब, 3 टीस्पून तेल गर्म करें और 3 लहसुन, 1 इंच अदरक और 2 मिर्च डालें/-

6 :- इसके अलावा, 2 टेबलस्पून हरा प्याज डालें और तेज़ आंच पर साट करें/-

7 :- इसके अलावा, 1 कप गाजर और 2 कप गोभी डालें। तेज आंच पर भूनें/-

8 :- अब इसमें ½ टीस्पून काली मिर्च और ½ टीस्पून नमक डालें/-

9 :- सब्जियों को स्टिर फ्राई करें/-

10 :- इसके अलावा, 2 टेबलस्पून हरा प्याज और स्टफिंग मिश्रण तैयार है/-

11 :- 30 मिनट के बाद, तैयार मोमोज आटा लें और एक मिनट के लिए फिर से गूंध लें/-

12 :- इसके अलावा, एक छोटी सी गेंद लें और फ्लैट करें/-

13 :- अब कुछ मैदे के साथ डस्ट करें और एक रोलिंग पिन का उपयोग करके रोल करना शुरू करें/-

14 :- अब बीच में तैयार किया स्टफिंग का एक टेबलस्पून रखें/-

15 :- एड्जस को धीरे से प्लीट करना शुरू करें और सब को इकट्ठा करें/-

16 :- बीच में दबाए और एक बंडल बनाते हुए मोमोज को सील करें/-

17 :- अब स्टीमर गरम करें और ट्रे में मोमोज़ को एक-दूसरे को छुए बिना व्यवस्थित रखें/-

18 :- इसके अलावा, 10-12 मिनट के लिए या चमकदार शीन को ऊपर दिखाने तक मोमोज को स्टीम करें/-

19 :- अंत में, वेज मोमोज रेसिपी मोमोज चटनी के साथ आनंद लेने के लिए तैयार है/-

धन्यवाद !!

veg momos recipe | momos ki recipe | momos banane ki recipe

Prep Time :-10 minutes

minsCook Time :- 25 minutes

minsTotal Time :-35 mins

Course :- indian street

food Cuisine :- nepali

Servings:- 12 Servings(pcs)

INGREDIENTS 

1x✔️ 2x 3x

for dough:

  • ▢1½ cup maida / plain flour
  • ▢½ tsp salt
  • ▢water for kneading
  • ▢oil for greasing

for stuffing:

  • ▢3 tsp oil
  • ▢3 clove garlic (finely chopped)
  • ▢1 inch ginger (finely chopped)
  • ▢2 chilli (finely chopped)
  • ▢4 tbsp spring onion
  • ▢1 cup carrot (grated)
  • ▢2 cup cabbage (shredded)
  • ▢½ tsp pepper (crushed)
  • ▢½ tsp salt

INSTRUCTIONS 

  • 1 :- firstly, prepare stuffing by heating 3 tsp oil and saute 3 clove garlic, 1 inch ginger and 2 chilli.
  • 2 :- also, add 2 tbsp spring onion and saute on high flame.
  • 3 :- further, add 1 cup carrot and 2 cup cabbage. stir fry on high flame.
  • 4 :- now add ½ tsp pepper and ½ tsp salt.
  • 5 :- additionally, 2 tbsp spring onion and stuffing mixture is ready.
  • 6 :-/further, pinch a small ball sized momos dough and flatten.
  • 7 :- now dust with some maida and start to roll using a rolling pin.
  • 8 :- roll to almost medium thin circle. around 4 – 5 inch in diameter. make sure you roll from sides and keep the centre slightly thick.
  • 9 :- now place a heaped tbsp of prepared stuffing in the centre.
  • 10 :- start pleating the edges slowly and gather everything.
  • 11:- press in middle and seal the momos forming a bundle.
  • 12 :- heat a steamer and arrange the momos in the tray without touching each other.
  • 13 :- furthermore, steam momos for 10-12 minutes or till shiny sheen appears over it.
  • 14 :- finally, veg momos recipe is ready to enjoy with momos chutney.

Thanks !!

Kulcha Recipe 【HINDI】

कुलचा बनने का समय

कुलचा बनाने में 20 मिनट का समय लगता है। इसे बनाने की तैयारी करने में 5 मिनट का समय लगता है।

कुलचे का स्वादिष्ट, नरम और मुलायम स्वाद सभी को पसंद होता है। आप जब चाहे इसे आसानी से अपने घर पर बनाकर सभी को खिला सकते है। कुलचे सभी के मनपसंद होते है।

सामग्री

  • 1/2 कप मैदा
  • 1 कप पानी
  • 1/2 टी स्पून बेकिंग पाउडर
  • 1/2 टी स्पून चीनी
  • 1/2 टी स्पून दही
  • 1 टी स्पून बटर
  • 2 टी स्पून हरा धनिया
  • 2 टी स्पून तेल
  • नमक स्वादानुसार

बनाने की विधि – How to make कुलचा (Kulcha Recipe)

1:- कुलचा बनाने के लिए सबसे पहले मैदा को एक बर्तन में ले और छलनी की मदद से अच्छे से छान ले। अब इसी बर्तन में मैदा के साथ बेकिंग पाउडर और नमक डालकर अच्छे से मिक्स कर दे।

2:- अब मैदा, बेकिंग पाउडर और नमक में तेल, दही और चीनी डालकर मिलाए। अब हल्के गुनगुने पानी की मदद से मैदा को अच्छे से गूथ ले। ध्यान रखे मैदा को थोड़ा नरम गुथे तभी आपके कुलचे अच्छे बनेंगे। गुथी हुई मैदा को कुछ देर के लिए ढक कर रख दे।

3:-इतना करने के बाद गुथे हुए मैदा को ले हाथ से अच्छे से मसल ले। अब उसमे से एक लोई तोड़े हथेली की मदद से उसे गोल कर ले। अब हाथ से दबाकर उसका आकार थोड़ा सा बड़ा कर ले।

4:- इसपर थोड़ा सा धनिया रखे और चकले और बेलन की मदद से इसे अपने अनुसार एक आकार दे। गैस पर तवा गरम करने के लिए रख दे। तवा गरम होने पर उसपर बना हुआ कुलचा डाले कुछ देर बाद कुलचे पर बुलबुले दिखने लगेंगे। तवे को गैस की तरफ उल्टा करे और दोनों तरफ से अपने कुलचे को सिकने तक सेके।

सभी सामग्री से इसी तरह कुलचे बना ले। कुछ ही देर में आपके स्वादिष्ट कुलचे बनकर तैयार है इन्हे प्लेट में निकाले ऊपर से बटर लगाए और सभी को गरम गरम कुलचे सर्वे करे।

Note:- शुरूवात कर 3 कुल्चो में धनिया पत्ता डालना भूल गया था

Kulcha Recipe {English}

How to make kulcha

1. Mix the maida or all-purpose flour, salt, sugar, baking powder and baking soda in a bowl. Make a well in the center.🐣

2. Add the curd, oil and water.,🐣

3. begin to mix the flour with the liquids first and then start to knead.🐣

4. make a smooth and soft dough.🐣

5. in the same bowl or pan, cover the dough with a wet kitchen napkin. You can also lightly brush some water on the dough and cover the pan with a lid.🐣

6. Let the dough leaven for 2 hours.🐣

7. Lightly knead the leavened dough again🐣

◆Making kulcha◆

8. Make small balls of the dough. Sprinkle some nigella seeds on the ball. With the rolling pin flatten the dough and roll each into a small-sized kulcha on a lightly dusted rolling board.🐣

9. heat a griddle or a tava. The tava has to be very hot. Place the kulcha on the tava.,🐣

10. Cook one side partly till it is ¼ cooked.🐣

11. Flip and cook the other side till it is ½ cooked. Apply ghee or oil on both sides of kulcha whilst cooking.🐣

12. Cook them till it gets golden spots and is evenly cooked. Make all kulchas this way.🐣

👉Serve the kulcha hot or warm with chickpea curry or chole masala. They can also be stacked in a roti basket and then served warm.🐣

Thanks !! 🐣

बेसन लड्डू रेसिपी | besan ladoo in hindi | बेसन के लड्डू | बेसन लाडू बनाने की विधि

 तैयारी का समय:5 MINUTES 

पकाने का समय:30 MINUTES

 कुल समय:35 MINUTES

 कितने लोगों के लिए: 12 लडू

LADOO AUTHOR: Beyond Eating

सामग्री

  • ▢½ कप घी
  • ▢2 कप बेसन, मोटे
  • ▢1 कप चीनी
  • ▢4 फली इलायची
  • ▢2 टेबल स्पून तरबूज के बीज
  • ▢2 टेबल स्पून काजू, कटा हुआ

अनुदेश

  • सबसे पहले एक बड़ी कड़ाई में, ½ कप घी गरम करें और 2 कप बेसन डालें।
  • जब तक बेसन अच्छी तरह से घी के साथ संयुक्त न हो जाए तब तक धीमी आंच पर भूनें। दानेदार बनावट के लिए मोटे बेसन का उपयोग सुनिश्चित करें।
  • धीमी आंच पर भूनते रहें। यदि मिश्रण सूख जाता है, तो एक और बड़े चम्मच घी डालें।
  • 20 मिनट के बाद, बेसन घी को छोड़ने लगता है।
  • तब तक भूनते रहें जब तक बेसन सुनहरा भूरा और दानेदार न हो जाए। इसमें लगभग 30 मिनट लग सकते हैं।
  • मिश्रण को एक बड़े कटोरे में स्थानांतरित करें, और थोड़ा ठंडा होने दे।
  •  2 बड़े चम्मच तरबूज के बीज और 2 बड़े चम्मच काजू को सूखा भूने।
  • धीमी आंच पर भूनें जब तक मेवे कुरकुरे न हो जाएं।
  • भुने हुए मेवे को भुने हुए बेसन घी के मिश्रण में मिलाएं।
  • एक ब्लेंडर में 1 कप चीनी और 4 फली इलायची लें। आप वैकल्पिक रूप से तगर या बोरा का उपयोग कर सकते हैं।
  • पानी को डालने के बिना एक ठीक पाउडर के लिए ब्लेंड करे।
  • बेसन के ठंडा होने पर (थोड़ा गरम) पीसा हुआ चीनी डालें।
  • सुनिश्चित करें कि सब कुछ अच्छी तरह से संयुक्त है और अच्छी तरह से मिश्रण करें। मिश्रण गरम होने पर चीनी न डालें, क्योंकि यह चीनी को पिघला देगा और मिश्रण को पानीदार बना देगा।
  • आवश्यकतानुसार चीनी को समायोजित कर के एक गेंद के आकार के लड्डू बनाएं।
  • अंत में, एक एयरटाइट कंटेनर में 2 सप्ताह के लिए बेसन लड्डू का आनंद लें।

स्टेप बाइ स्टेप फोटो के साथ बेसन के लड्डू कैसे बनाएं :

  1. सबसे पहले एक बड़ी कड़ाई में, ½ कप घी गरम करें और 2 कप बेसन डालें।

2.जब तक बेसन अच्छी तरह से घी के साथ संयुक्त न हो जाए तब तक धीमी आंच पर भूनें। दानेदार बनावट के लिए मोटे बेसन का उपयोग सुनिश्चित करें।

3.धीमी आंच पर भूनते रहें। यदि मिश्रण सूख जाता है, तो एक और बड़े चम्मच घी डालें।

4. 20 मिनट के बाद, बेसन घी को छोड़ने लगता है।

6. मिश्रण को एक बड़े कटोरे में स्थानांतरित करें, और थोड़ा ठंडा होने दे।

7.  2 बड़े चम्मच तरबूज के बीज और 2 बड़े चम्मच काजू को सूखा भूने।

8.धीमी आंच पर भूनें जब तक मेवे कुरकुरे न हो जाएं।

9.भुने हुए मेवे को भुने हुए बेसन घी के मिश्रण में मिलाएं

10.एक ब्लेंडर में 1 कप चीनी और 4 फली इलायची लें। आप वैकल्पिक रूप से तगर या बोरा का उपयोग कर सकते हैं।

11.पानी को डालने के बिना एक ठीक पाउडर के लिए ब्लेंड करे।

12.बेसन के ठंडा होने पर (थोड़ा गरम) पीसा हुआ चीनी डालें।

13.सुनिश्चित करें कि सब कुछ अच्छी तरह से संयुक्त है और अच्छी तरह से मिश्रण करें। मिश्रण गरम होने पर चीनी न डालें, क्योंकि यह चीनी को पिघला देगा और मिश्रण को पानीदार बना देगा।

14.आवश्यकतानुसार चीनी को समायोजित कर के एक गेंद के आकार के लड्डू बनाएं।

15.अंत में, एक एयरटाइट कंटेनर में 2 सप्ताह के लिए बेसन लड्डू का आनंद लें।

धन्यवाद !!!

GUJIYA

एक नज़ररेसिपी क्विज़ीन :-

इंडियनसमय :1 से 1.5 घंटेमील टाइप :वेज

आवश्यक स‌ामग्री – Ingredients for Mawa Gujiya 👇

आटा लगाने के लिए

  • मैदा – 2 कप (250 ग्राम)
  • घी – आटा गूंथने के लिए और गुजिया तलने के लिए
  • घी- गुजिया तलने के लिए

स्टफिंग के लिए

  • मावा – 100 ग्राम/रावा (सुजी)
  • काजू – 1 टेबल स्पून
  • किशमिश – 1 टेबल स्पून
  • चिरौंजी – 1 टेबल स्पून
  • इलायची – 4 से 5
  • स‌ूखा गोला – 2 टेबल स्पून ( कद्दूकस किया हुआ)
  • चीनी पाउडर – 1/2 कप (80 ग्राम)

विधि – How to make Gujiya👇

सख्त आटा गूंथिए
मैदा में ¼ कप मोयन यानिकि घी डालकर अच्छे से मिक्स कर लीजिए. मैदे में थोड़ा-थोड़ा पानी डालते हुए पूरी के आटे से भी सख्त आटा गूंथ लीजिए. इसे मसलकर चिकना कर लीजिए और आटे को 20 मिनिट तक ढककर रख दीजिए. इतनी मात्रा के मैदा में आधे कप से भी कम पानी लगा है.

कसार/ स्टफिंग तैयार कीजिए
पैन गरम कीजिए और इसमें मावा डालकर लगातार चलाते हुए हल्का ब्राउन होने तक भून लीजिए. इस दौरान आंच मध्यम रखिए. मावा भुन जाने के बाद, इसे प्याले में निकाल लीजिए और ठंडा होने दीजिए.

गुजिया बनाइए
आटे को मसलकर ठीक कर लीजिए. फिर, इससे 20 से 25 छोटी-छोटी लोइयां तोड़ लीजिए. प्रत्येक लोई गोल करके पेड़े जैसा बनाकर रख लीजिए.

एक लोई उठाकर चकले पर रखिए और इसे 4 से 4.5 इंच व्यास की पतली पूरी बेल लीजिए. सांचे के ऊपर पूरी रखिए और 1 से 1.5 छोटी चम्मच फिलिंग डाल दीजिए. पूरी के किनारे पर थोड़ा सा पानी लगाकर सांचे को बंद कीजिए और हल्का सा दबा दीजिए तथा कटिंग निकालकर रख दीजिए. ये कटिंग भी बाद में गुजिया बनाने के काम आ जाती है. सांचे को खोलिए और गुजिया को निकालकर थाली में रखिए और उसे कपड़े से ढक दीजिए ताकि ये सूखे ना. इसी तरह सारी गुजिया तैयार करके थाली में रखते जाइए.

गुजिया तलिए
कढ़ाही में गुजिया तलने के लिए पर्याप्त मात्रा में घी डालकर गरम कर लीजिए. गरम घी में एक-एक करके जितनी गुजिया कढ़ाही में आ जाएं, उतनी गुजिया डाल दीजिए. गुजिया को मध्यम और धीमी आंच पर ब्राउन होने तक तल लीजिए. एक ओर तल जाने के बाद, गुजिया को दूसरी तरफ पलटकर भी तल लीजिए. अच्छे से तली हुई गुजिया को निकालकर प्लेट में रख लीजिए.

स्वादिष्ट मावा की गुजिया तैयार हैं. इन्हें आप किसी भी त्यौहार पर या जब भी आपका मन हो, तब बनाइए और गरमागरम गुजिया खाइए. इन्हें ठंडा होने के बाद एअर टाइट कन्टेनर में भरकर रख लीजिए और 15 दिनों तक चाव से खाते रहिए.

सुझाव 👇

  • कसार में बेसन, सूजी इत्यादि मावा में भूनकर मिलाकर अलग-अलग स्वाद की गुजिया तैयार कर सकते हैं.
  • पिसी हुई चीनी की जगह तगार या खांड़ भी ले सकते हैं.
  • गुजिया फटे ना, इसके लिए 4 बातों का ध्यान रखें. पहला, गुजिया भरते समय सारे किनारों पर हल्का सा पानी लगाकर अच्छे से चिपका दें. दूसरा गुजिया में कसार ज्यादा ना भरें. तीसरा, मैदा गूंथते समय मोयन ज्यादा न डालें. इससे गुजिया नरम होकर तलते समय फट जाती है. चौथा, गुजिया को बहुत ही सावधानी से हल्के हाथों से हैन्डल कीजिए. उंगली लगने से भी गुजिया फट जाती हैं.

Lunch Time

The lunch break helps you stay focused and energized throughout the day by recharging both your body and your mind. When you plan your lunch you have the opportunity to be healthy and nutritious, but you can also be creative with your lunchtime options and activities so that you will look forward to and make time for lunch.