Course: Curries, Main Course Cuisine: Indian, North Indian Keyword: Chole recipe Yield: 4 people Calories: 200kcal
Materials
- For making tomato puree
2 large Red ripe tomatoes roughly chopped
2 Green Chillies
2 to 3 Garlic cloves
1-inch Ginger
Other ingredients
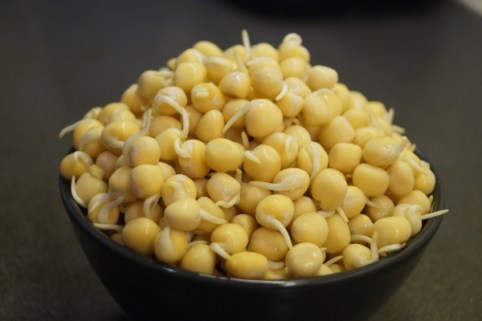
1 bowl Yellow matar/ white matar soaked overnight
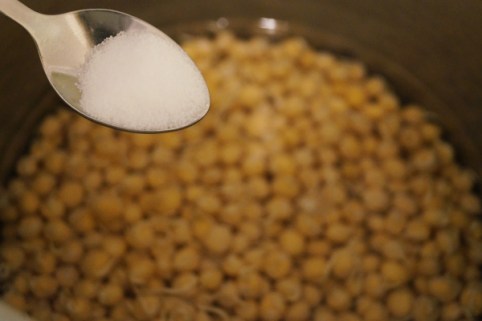
½ tsp Salt for pressure cooking
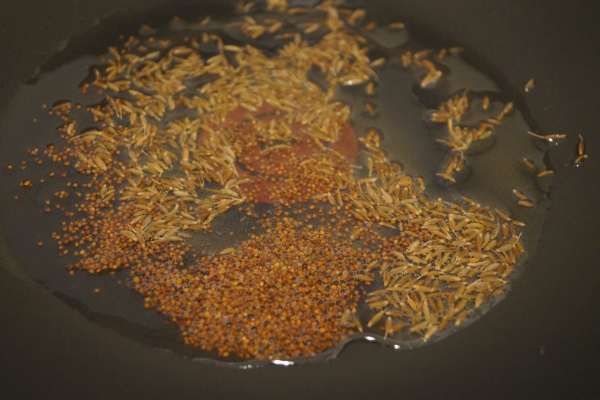
1 tsp Rai/ mustard seeds
1 tsp Jeera/ Cumin seeds
Bay leaf
2 dry Red chillies whole
2 medium Onions finely chopped
½ tsp Haldi/ Turmeric powder
1 tsp Lal mirch/ Red chilli powder
1 tsp Dhaniya powder/ coriander leaves
½ tsp Kitchen king masala
1 tsp Kasuri methi crushed between palms
½ tsp Garam masala
Salt per taste
Cooking oil
Instructions
Soaking and pressure cooking matar:
*Rinse 1 bowl of white/yellow matar under running water and soak the rinsed matar in a large bowl with enough quantity of water.
*Rinse the soaked matar again under running water and put it in the pressure cooker, with the pinch of salt.
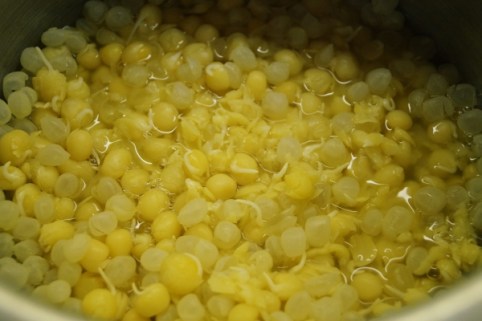
*Pressure cook the matar in the cooker for 1 whistle, until it turns soft and can be mashed easily with the spoon or fingers.
- For making Matar ke chole recipe:
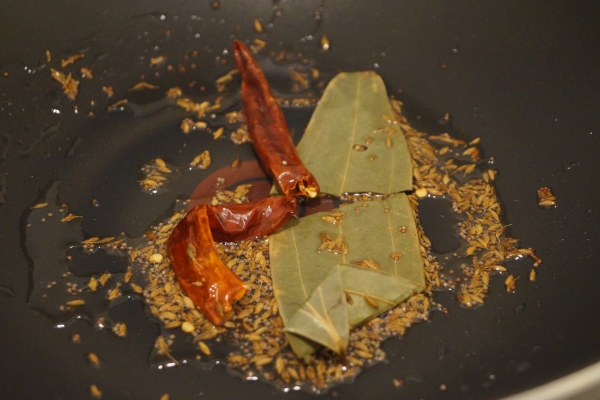
- Heat the oil in a pan or kadhai on a medium-low flame and add a tsp of rai and jeera, saute till it splutters.
- Add 1 bay leaf in the kadhai and 2 dry red chillies in the kadhai and saute for half a minute.
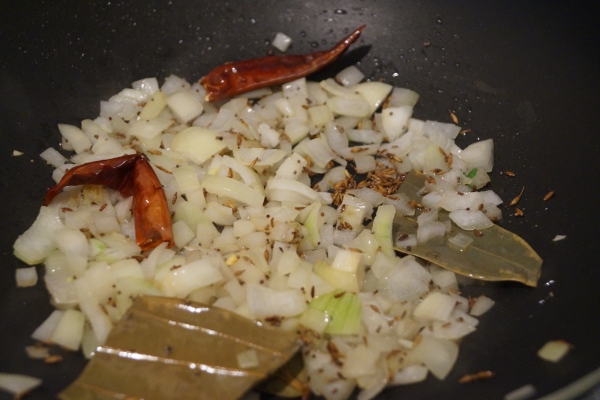
- Now, add finely chopped onions and stir it till it turns golden brown in colour and looks translucent.
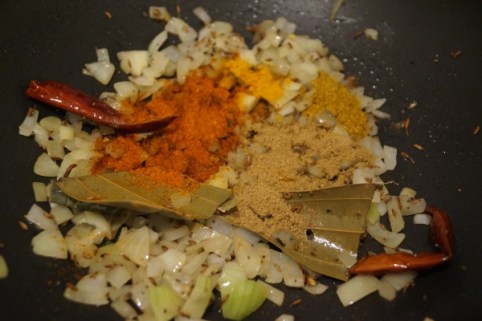
- Add haldi, coriander powder, red chilli powder, and kitchen king masala in the kadhai.
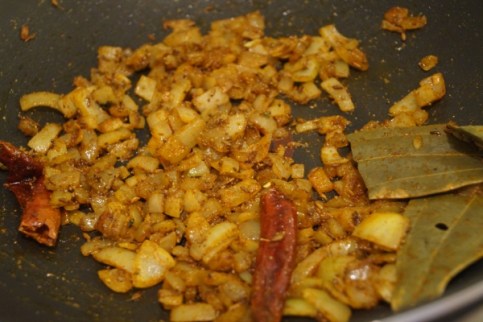
- Mix all the ingredients nicely and sprinkle some tbsp of water in the kadhai and cook the dry spices for few minutes.
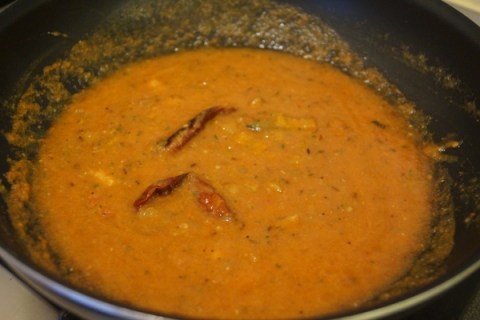
- After 2 minutes, add tomato, green chilli, garlic and ginger puree in the kadhai and give it a nice mix.
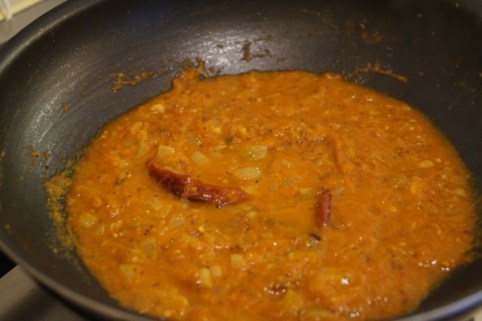
- Cook till the tomato puree is cooked properly and oil is released at the sides of the pan.
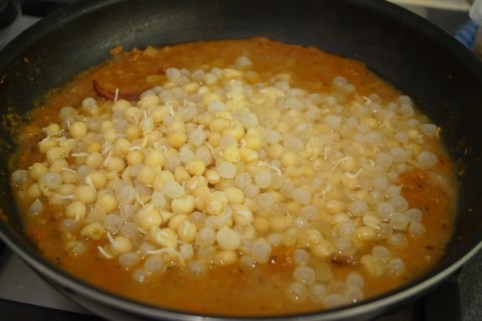
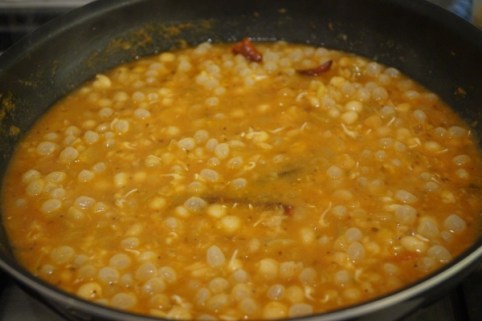
- Now, add pressured cooked matar along with its water and mix the matar along with onion tomato masala nicely.
- Cover and cook the matar for 7 to 8 minutes and allow it to simmer on the medium-low flame till you get a perfect consistency.
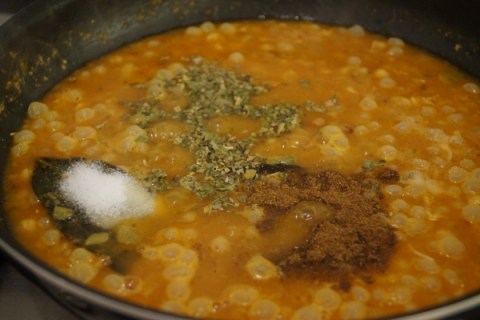
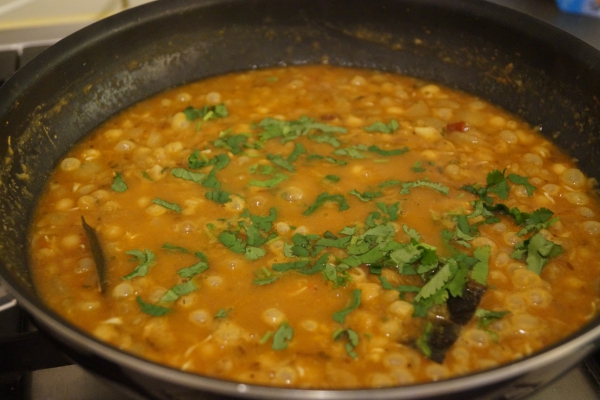
- Finally, add kasuri methi, garam masala and salt per taste and stir it nicely.
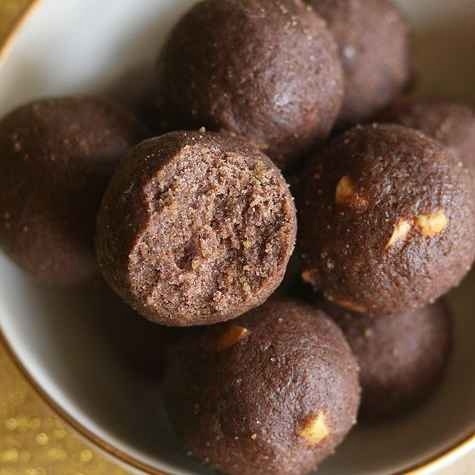
- Garnish it with freshly chopped coriander leaves and matar ke chole is ready to be served hot.
STEP BY STEP INSTRUCTIONS:-
SOAKING AND PRESSURE COOKING MATAR:
1 :- Rinse 1 bowl of white/yellow matar under running water and soak the rinsed matar in a large bowl with enough quantity of water.
FOR MAKING MATAR KE CHOLE RECIPE:

IMPORTANT TIPS FOR MAKING MATAR KE CHOLE RECIPE:-
Soak the yellow matar for at least 7 to 8 hours, it helps in easy cooking.
After soaking, I usually prefer to wait until the matar sprouts, as it makes the matar healthier.
You can also add potatoes in the pressure cooker, it thickens the gravy consistency.
Garnish it with barik sev, pomegranate seeds, chaat masala, roasted peanuts, and finely chopped onions and tomatoes. It makes a nice ragada chaat recipe.
Lastly, you can also have this chole recipe with puri, bhature, kulcha and naan.