Bhindi Ki Sabji | Ladies Finger Recipe

Simple ladies finger dry curry made with okra, spices, onion and tomatoes. This is an easy to prepare sabji and is healthy as well. The dish is mildly spiced yet it tastes very delicious. It goes well with plain rice, roti or even as a side with plain rice and dal. It also goes well in the lunch box. Since it is a dry curry it can also be used as a filling to make chapati or roti rolls.

Tips to make a good bhindi ki sabji :-

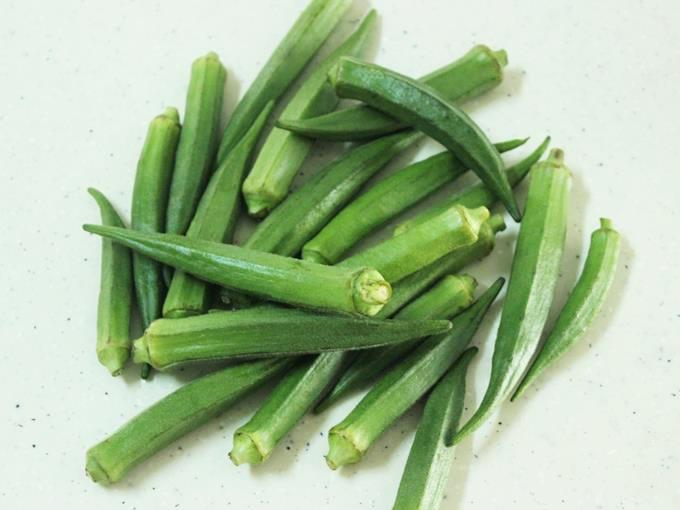
:- Always choose young bhindi as they are less slimy. So they cook faster and taste good.


:- Prepare them within a day or two after buying them from the market. They continue to age even though by refrigerated.


:- Avoid buying bhindi with dark spots on them as they indicate they are aged. These take longer to cook and don’t taste good.


:- Avoid over stirring them in the pan. If they are too slimy, add in a tbsp of lemon juice to get rid of it.

NOTE

For health benefits, do not overcook ladies finger or until they turn too soft. Just cook until they are no more slimy.

For more recipes, you can check :-

Matar Ka chhola

Methi or Matar

Began ka Sabji

INGREDIENTS (US CUP = 240ML )
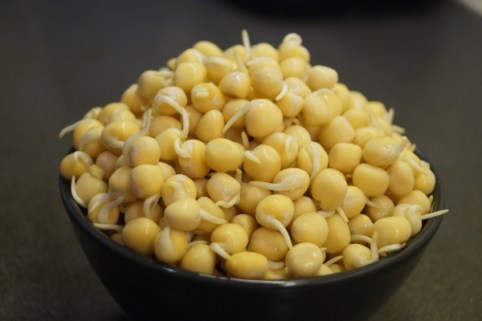
▢300 grams okra (bhindi – ladies finger)
▢2 tablespoons oil
▢½ teaspoon cumin seeds (jeera)
▢1 tablespoon garlic (1 cloved chopped, optional)
▢1 large onion (sliced, about ¾ cup sliced)
▢1 green chili (slit or chopped)
▢salt as needed
▢½ teaspoon red chili powder
▢½ teaspoon Garam masala (or 1 tbsp pav bhaji masala or sambar powder)
▢⅛ teaspoon turmeric
▢1 large tomato (chopped, about ½ cup)
▢1 tsp kasuri methi (or curry leaves)
▢2 tablespoons coriander leaves (chopped, optional)

How to Make Bhindi Ki Sabji (Stepwise photos) :-

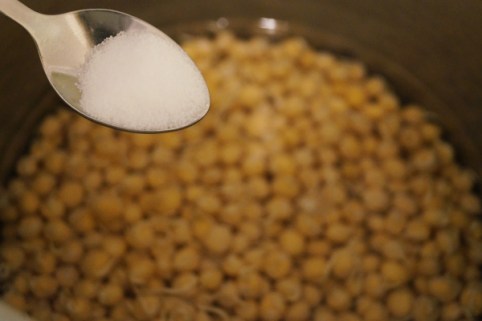
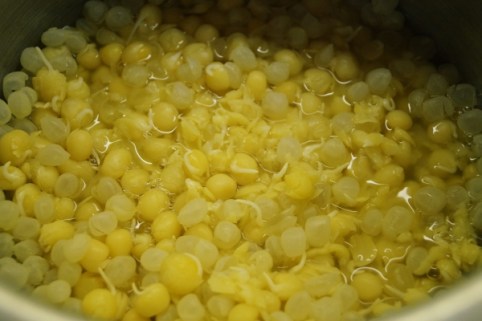
1. Rinse 250 to 300 grams ladies finger under runny water. I spray vinegar and sprinkle some salt. Leave them for about 10 to 20 mins. Rinse them well under running water.

2. Drain them to a colander and let dry them for a while. Wipe off with kitchen tissues or clean napkin. They must not be moist or wet otherwise they will become slimy when you chop.

3. Chop them to half inch pieces and set aside. While you chop, if the knife becomes slimy, wipe off with a kitchen tissue. Then slice 1 large onions (¾ cup sliced). Chop 1 large tomatoes (about half cup chopped) and chop 1 green chili. You can deseed the tomatoes if you don’t like them.

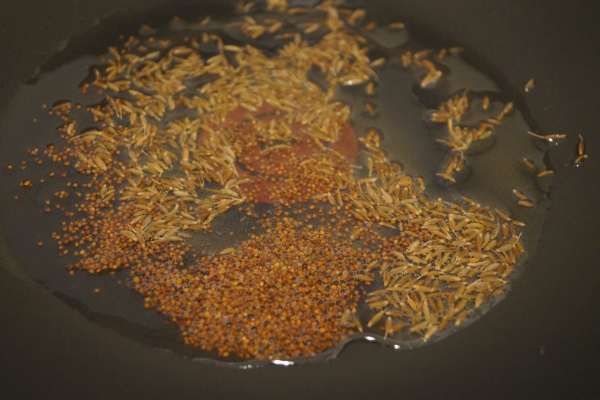
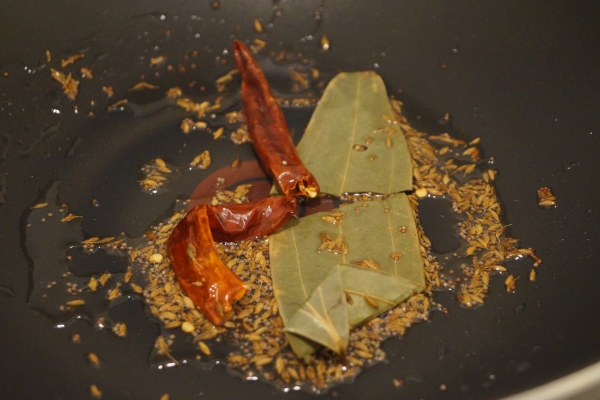
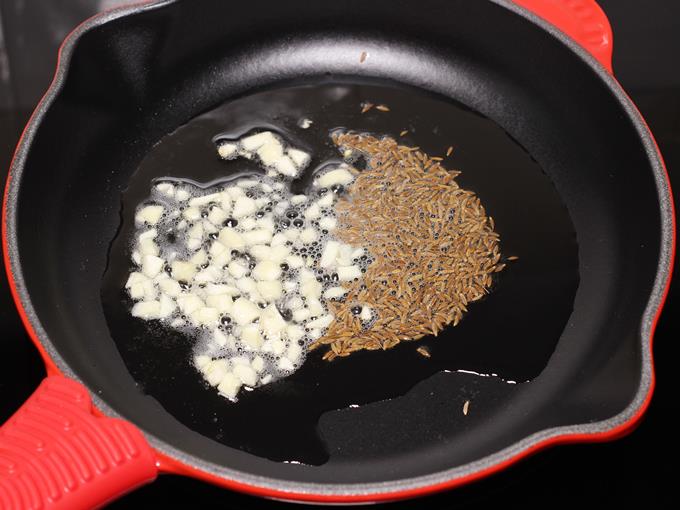
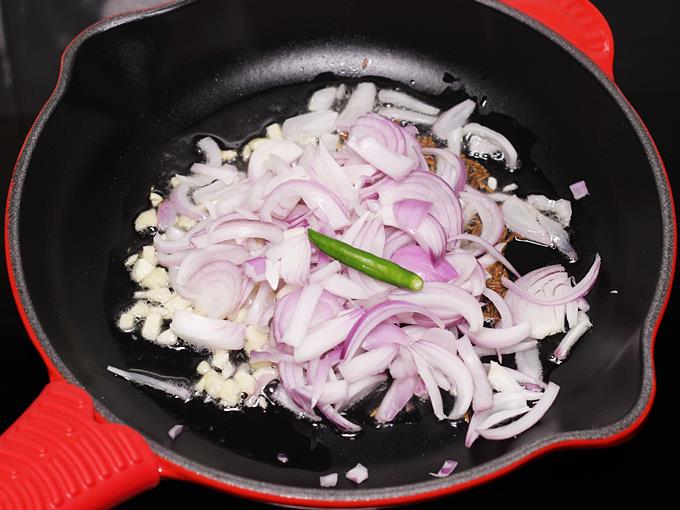
4. Heat a pan with oil. Add half teaspoon cumin seeds. When the seeds begin to splutter add 1 tbsp chopped garlic. Saute just for 30 seconds without browning the garlic.

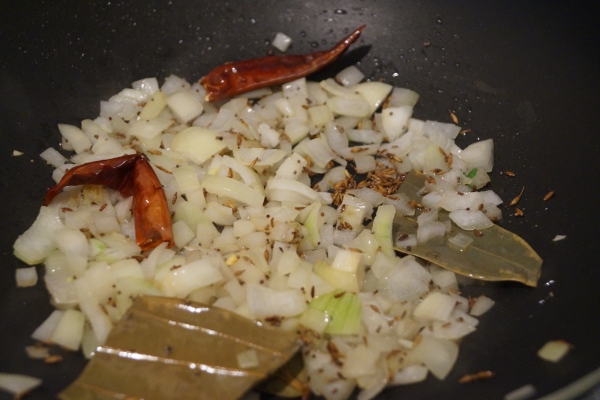
5. Next add in the sliced onions and green chilies.

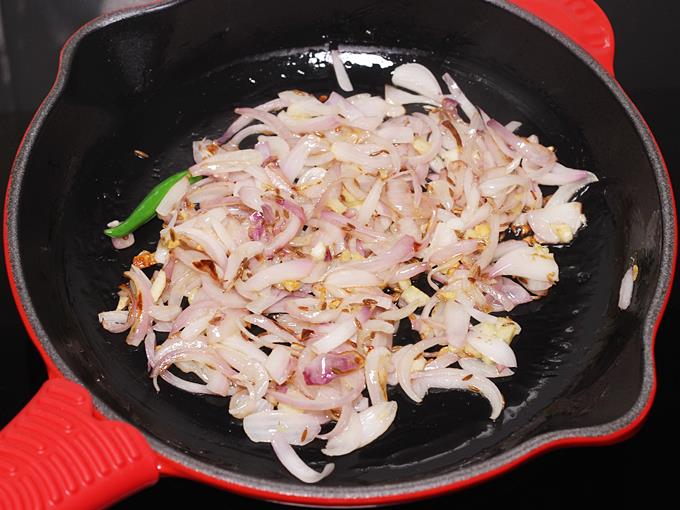
6. Keep strirring and fry them until lightly golden.

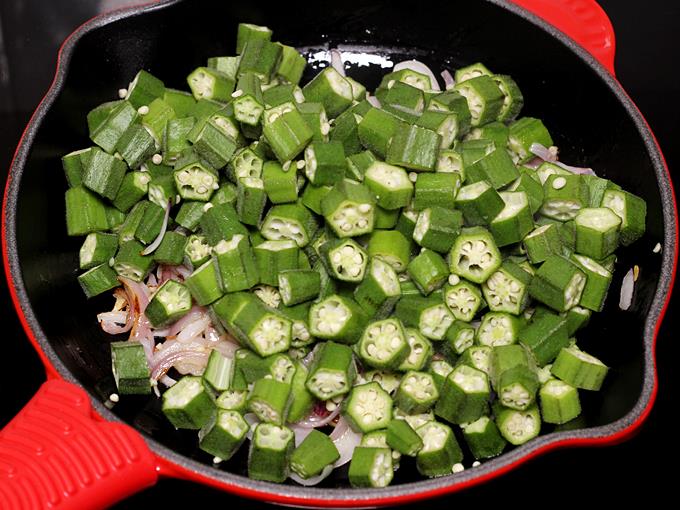
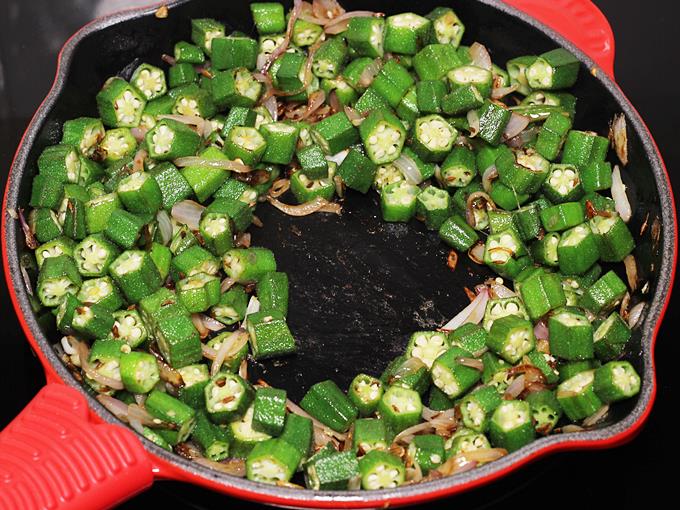
7. Add in chopped bhindi.

8. Fry them until they are half cooked yet crunchy. But they should not be sticky anymore.

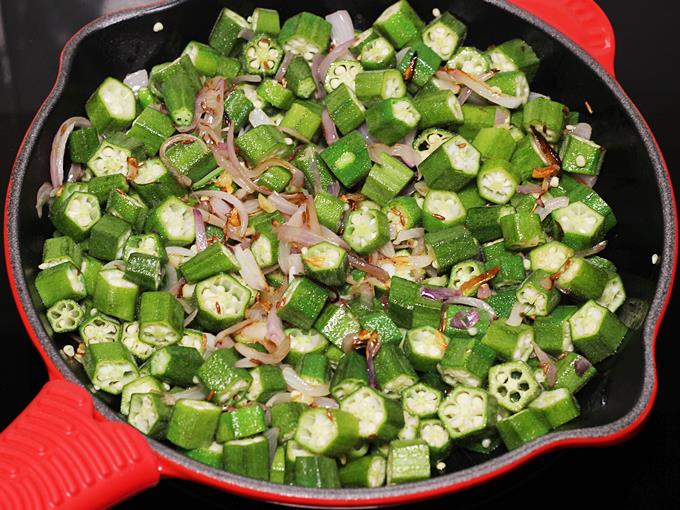
9. While frying stir often but don’t overdo as they become more slimy. Scrape off the bottom gently if it begins to burn. You can also add a tsp of oil to prevent burning.

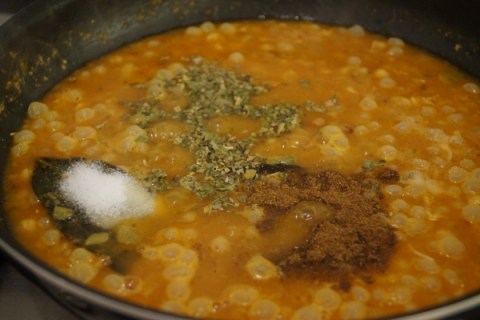
10. Sprinkle salt. I used half teaspoon Himalayan salt.

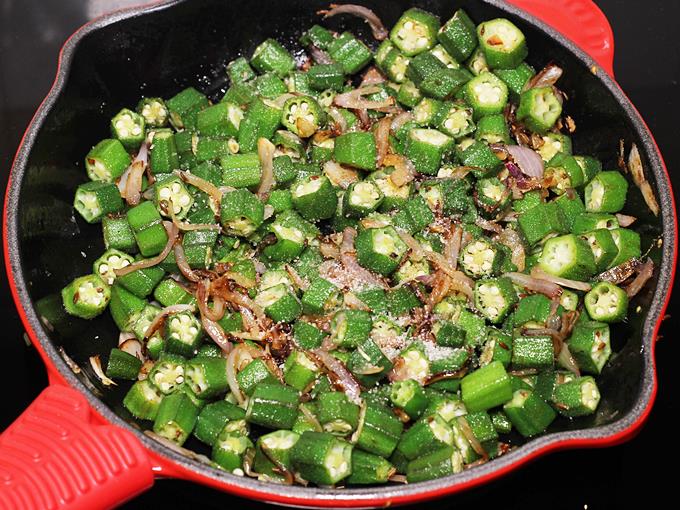
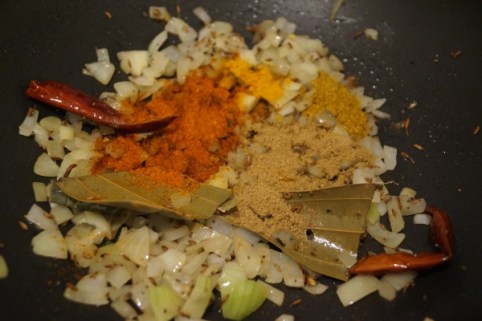
11. Next sprinkle 1/8 teaspoon turmeric, half teaspoon red chili powder and half teaspoon garam masala. If you do not like garam masala in this, just add good pav bhaji masala or sambar powder.

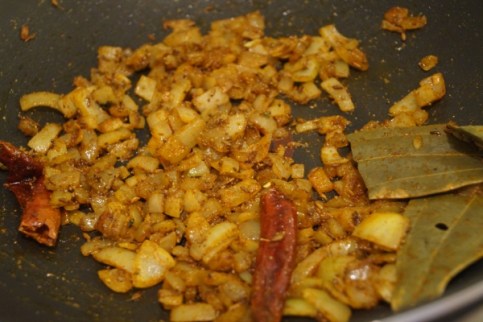
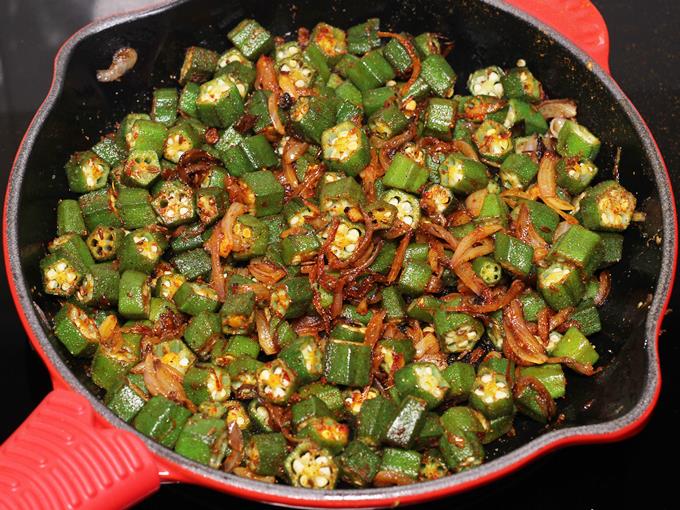
12. Saute for 2 mins.

13. Add chopped tomatoes.

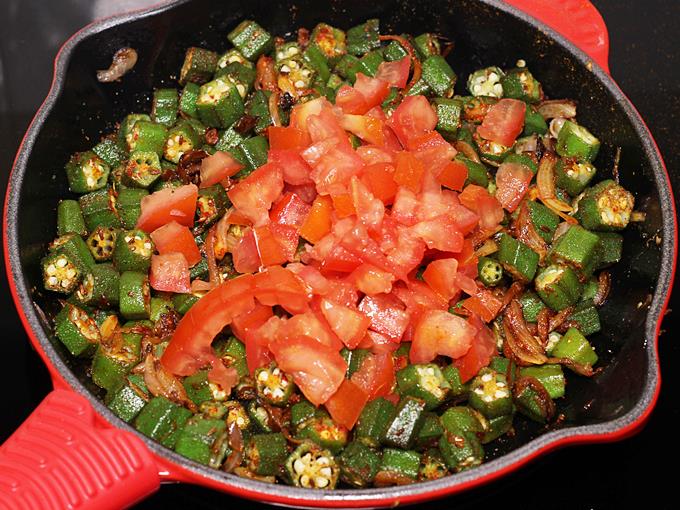
14. Again fry the ladies finger for 2 mins.

15. Cover and cook till the tomatoes turn mushy & soft.

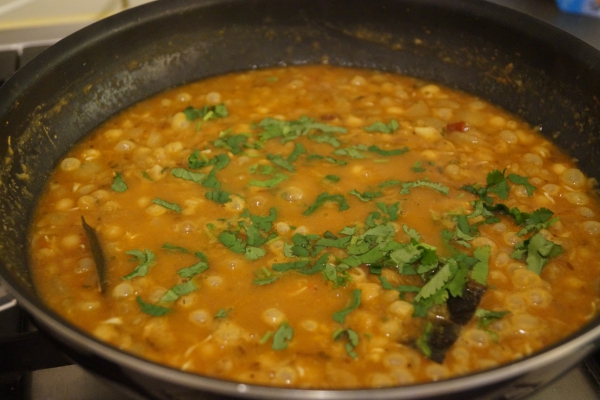
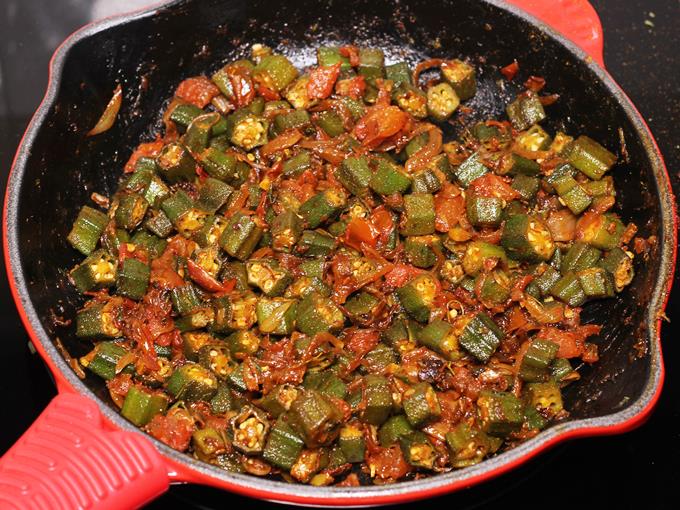
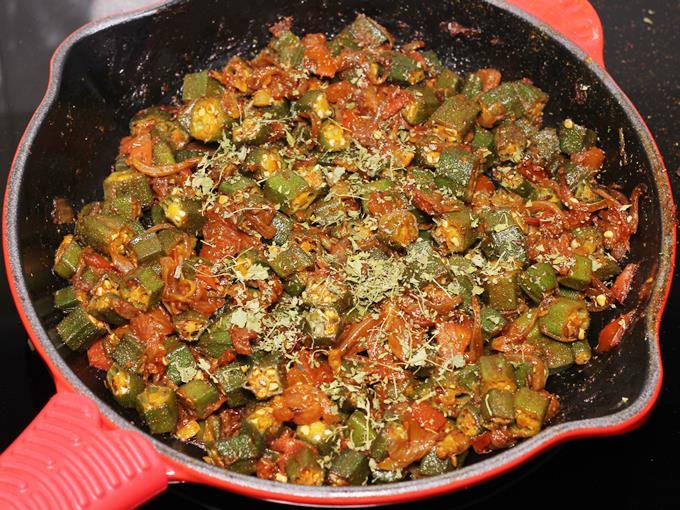
16. Check the salt and spice. If needed add more salt. Then add 1 teaspoon kasuri methi or curry leaves. Fry for another 2 to 3 mins till the raw smell of tomatoes goes away.

17. If you prefer fully cooked bhindi, then keep mixing and cook until soft. We eat semi cooked bhindi so I turn off early. .

भिंडी की सब्जी को चावल या चपाती के साथ परोसिये और खाइये.

!! Matar Ke Chole Recipe !!

Matar ke chole is a spicy, savoury and tangy gravy curry made from soaked and pressure cooked white peas or matar in tomato puree.

Course: Curries, Main Course Cuisine: Indian, North Indian Keyword: Chole recipe Yield: 4 people Calories: 200kcal

Materials

  • For making tomato puree
    2 large Red ripe tomatoes roughly chopped
    2 Green Chillies
    2 to 3 Garlic cloves
    1-inch Ginger

Other ingredients
1 bowl Yellow matar/ white matar soaked overnight
½ tsp Salt for pressure cooking
1 tsp Rai/ mustard seeds
1 tsp Jeera/ Cumin seeds
Bay leaf
2 dry Red chillies whole
2 medium Onions finely chopped
½ tsp Haldi/ Turmeric powder
1 tsp Lal mirch/ Red chilli powder
1 tsp Dhaniya powder/ coriander leaves
½ tsp Kitchen king masala
1 tsp Kasuri methi crushed between palms
½ tsp Garam masala
Salt per taste
Cooking oil

Instructions

Soaking and pressure cooking matar:
*Rinse 1 bowl of white/yellow matar under running water and soak the rinsed matar in a large bowl with enough quantity of water.                                                         
*Rinse the soaked matar again under running water and put it in the pressure cooker, with the pinch of salt.
*Pressure cook the matar in the cooker for 1 whistle, until it turns soft and can be mashed easily with the spoon or fingers.

  • For making Matar ke chole recipe:
    • Heat the oil in a pan or kadhai on a medium-low flame and add a tsp of rai and jeera, saute till it splutters.
  • Add 1 bay leaf in the kadhai and 2 dry red chillies in the kadhai and saute for half a minute.
  • Now, add finely chopped onions and stir it till it turns golden brown in colour and looks translucent.
  • Add haldi, coriander powder, red chilli powder, and kitchen king masala in the kadhai.
  • Mix all the ingredients nicely and sprinkle some tbsp of water in the kadhai and cook the dry spices for few minutes.
  • After 2 minutes, add tomato, green chilli, garlic and ginger puree in the kadhai and give it a nice mix.
  • Cook till the tomato puree is cooked properly and oil is released at the sides of the pan.
  • Now, add pressured cooked matar along with its water and mix the matar along with onion tomato masala nicely.
  • Cover and cook the matar for 7 to 8 minutes and allow it to simmer on the medium-low flame till you get a perfect consistency.
  • Finally, add kasuri methi, garam masala and salt per taste and stir it nicely.
  • Garnish it with freshly chopped coriander leaves and matar ke chole is ready to be served hot. 

STEP BY STEP INSTRUCTIONS:-

SOAKING AND PRESSURE COOKING MATAR:

1 :- Rinse 1 bowl of white/yellow matar under running water and soak the rinsed matar in a large bowl with enough quantity of water.

2:- Rinse the soaked matar again under running water and put it in the pressure cooker, with the pinch of salt.
3:- Pressure cook the matar in the cooker for 1 whistle, until it turns soft and can be mashed easily with the spoon or fingers.

FOR MAKING MATAR KE CHOLE RECIPE:

Heat the oil in a pan or kadhai on a medium-low flame and add a tsp of rai and jeera, saute till it splutters.
Add 1 bay leaf in the kadhai and 2 dry red chillies in the kadhai and saute for half a minute.
Now, add finely chopped onions and stir it till it turns golden brown in colour and looks translucent.
Add haldi, coriander powder, red chilli powder, and kitchen king masala in the kadhai.
Mix all the ingredients nicely and sprinkle some tbsp of water in the kadhai and cook the dry spices for few minutes.
After 2 minutes, add tomato, green chilli, garlic and ginger puree in the kadhai and give it a nice mix.
Cook till the tomato puree is cooked properly and oil is released at the sides of the pan.
Now, add pressured cooked matar along with its water and mix the matar with onion tomato masala nicely.
Cover and cook the matar for 7 to 8 minutes and allow it to simmer on the medium-low flame till you get a perfect consistency.
Garnish it with freshly chopped coriander leaves and matar ke chole is ready to be served hot.

IMPORTANT TIPS FOR MAKING MATAR KE CHOLE RECIPE:-

Soak the yellow matar for at least 7 to 8 hours, it helps in easy cooking.
After soaking, I usually prefer to wait until the matar sprouts, as it makes the matar healthier.
You can also add potatoes in the pressure cooker, it thickens the gravy consistency.
Garnish it with barik sev, pomegranate seeds, chaat masala, roasted peanuts, and finely chopped onions and tomatoes. It makes a nice ragada chaat recipe.
Lastly, you can also have this chole recipe with puri, bhature, kulcha and naan.

!! Sabudana Laddu Recipe For Vrat !!

सामग्री (Ingredients) –

Sago साबुदाना (छोटे दाने वाले) – एक कप

Desi ghee देसी घी – दो छोटी चम्मच

Sugar चीनी – 150 ग्राम

Some chopped dry fruits थोड़े से कटे हुए काजू और बादाम

Orange food color आरेंज कल़र (फूड कलर) – एक छोटी चम्मच (Optional)

Cardamom powder इलायची पाउडर – एक छोटी चम्मच

साबूदाने के लड्डू बनाने की विधि (How to make Sabudana laddu) –

  • लड्डू बनाने के लिए सबसे पहले साबूदाने को एक बड़े बाउल में डालकर इसे साफ पानी से दो-तीन बार अच्छे से धो लीजिए।
  • इसके बाद साबूदाने में लगभग आधा कप पानी डालकर इसे 4 से 5 घंटे के लिए ढककर एक साइड में रख दें, जिससे साबूदाने पानी सोखकर अच्छे से फूल जाए।
4 से 5 घंटे के बाद जब साबूदाने अच्छे से फूल जाए तब इसका लड्डू बनाना शुरू करें।

अब कड़ाही को गैस पर रखकर इसमें 2 छोटी चम्मच देसी घी डालकर पहले गर्म कर लीजिए।
घी गर्म होने के बाद कड़ाही में कटे हुए थोड़े से काजू, बादाम डालकर मध्यम आंच पर बराबर चलाते हुए हल्के सुनहरे रंग में भून लीजिए और फिर इसे एक प्लेट में निकाल लें।

इसके बाद कड़ाही में जो घी बचे हैं उसी में साबूदाने को डालकर धीमी आंच पर बराबर चलाते हुए 1 से 2 मिनट तक भूनें। क्योंकि तेज आंच पर भूनने से साबूदाने कड़ाही की तली में जल्दी से चिपक कर जलने लगेंगे। इसलिए साबूदाने को आप धीमी आंच पर ही 1 से 2 मिनट तक भूनें।

साबूदाने को भूनने के बाद अब इसमें दो तिहाई कप चीनी और एक छोटी चम्मच आरेंज फूड कलर डालकर अच्छे से साबूदाने में मिलाते हुए तब तक पकाएं, जब तक चीनी पूरी तरह से गलकर साबूदाने के अंदर चासनी पहुंच ना जाए। क्योंकि जब साबूदाने के अंदर तक चासनी अच्छे से पहुंची रहेगी तभी लड्डू खाने में स्वादिष्ट लगेंगे।

Read :- https://beyondeating.food.blog/2021/09/26/restaurant-style-pressure-cooker-egg-biryani-mughlai-egg-biryani/

लड्डू को अच्छे से पकाने के बाद अब इसमें भुने हुए काजू बादाम और एक छोटी चम्मच इलायची पाउडर डालकर अच्छे से मिलाएं और फिर गैस को बंद करके कड़ाही को गैस से उतारकर लड्डू को ठंडा होने के लिए रख दें। क्योंकि जब यह अच्छे से ठंडे रहेंगे तभी इसका लड्डू आसानी से बना पाएंगे।

जब लड्डू अच्छे से ठंडा हो जाए तब हाथ में आप थोड़ा घी लगा कर चिकना करें और फ़िर इसका आप अपने हिसाब से छोटे छोटे साइज के लड्डू बनाकर तैयार कर लीजिए।

अब साबूदाने का यह लड्डू बनकर खाने के लिए तैयार है। इस तरह से लड्डू आप घर पर व्रत में या फिर बिना व्रत के भी बना कर खा सकते हैं।

सुझाव (Suggestion) –

साबूदाने का लड्डू बनाते समय ध्यान रखें कि जब आप साबूदाने को भिगोएं तो बर्तन में जितना साबूदाना है उसी के बराबर तक पानी डालें, क्योंकि अगर पानी साबूदाने में ज्यादा डालेंगे तो साबूदाने फूलने के बाद गीले रहेंगे।

(11 votes, average: 3.09 out of 5)

Check Other Recipes


FOLLOW US

Plot No, 44, Hosur Rd, Konappana Agrahara, Electronic City, Bengaluru, Karnataka 560100

About Us


Beyond Eating is an Indian food blog and an Indian recipe library in Hindi. The site is updated regularly to provide quality recipes. The new food recipes mentioned here are awesome.

Contact us: twenty4eleven19@gmail.com

FOLLOW US
https://instagram.com/ayush_rajput1996?utm_medium=copy_link


2020 beyond Eating | Food Recipe

व्रत का दो बूंद तेल में बना बिल्कुल नए तरीके का नाश्ता जिसे आप बिना बनाए रह नही पायेंगे | vrat nashta

कभी-कभी जब आप व्रत होते हैं और आपके पास समय कम रहता है तो आप सोचते हैं कि कम समय में झटपट से क्या नाश्ता बनाया जाए। उसके लिए अगर घर में आपके समा के चावल हैं तो आप इस नाश्ते को बहुत ही कम समय में घर पर आसानी से बना सकते हैं। समा के चावल का बना यह नाश्ता बनाने में एकदम आसान है खाने में उससे भी ज्यादा यह स्वादिष्ट लगता है।

Ingredients सामाग्री –

Sama rice समा चावल – 1 cup (200gm)

Boiled potato उबले आलू – 2

Chopped green chilly कटी हुई हरी मिर्च – 2

Cumin seeds जीरा – 1 tsp

Crushed black pepper दरदरा कुटा हुआ काली मिर्च – 1 tsp

Rock Salt सेंधा नमक- 1 tsp

Some coriander leaves कुछ हरी धनिया पत्ती

For chatni चटनी के लिए सामग्री –

Roasted peanuts भुनी हुई मूंगफली – 50gm

Dry coconut सुखा नारियल – 1 tbsp

Green chilly हरी मिर्च – 2

Rock Salt सेंधा नमक – 1/2 tsp

Some curry leaves कुछ करी पत्ता

समा के चावल का नाश्ता बनाने की विधि (How to make Samak Rice Nashta) –

नाश्ता बनाने के लिए सबसे पहले समा के चावल को एक बाउल में डालकर इसे 2 से 3 बार साफ पानी से अच्छे से धो लीजिए। जिससे चावल में ऊपर से लगे पाउडर अच्छे से धुल जाएं।

चावल को पानी से साफ करने के बाद अब बाउल में जितना चावल है उसी के बराबर पानी डालकर इसे 1 घंटे के लिए भिगो कर रखें जिससे चावल अच्छे से फूल जाए और यह पानी को पूरी तरह से सोख ले।

चावल 1 घंटे बाद जब अच्छे से फूल जाए तब इसे मिक्सर जार में डालकर बिना पानी के (पानी ना डालें) अच्छे से पीस लीजिए।

अब एक बर्तन में दो उबले आलू को अच्छे से फोड़कर मैश करें।

इसके बाद आलू में डालें पीसा हुआ चावल, एक छोटी चम्मच जीरा एक छोटी चम्मच दरदरा काली मिर्च पाउडर, दो बारीक कटी हुई हरी मिर्च, एक छोटी चम्मच सेंधा नमक स्वाद के अनुसार और थोड़ा सा बारीक कटा हुआ हरा धनिया डालकर सारी चीजों को अच्छे से मिला लीजिए। इसके बाद इसमें लगभग एक चौथाई कप पानी डालकर नाश्ते के लिए गाढा बैटर बनाकर तैयार कर लीजिए।

Read :- https://beyondeating.food.blog/2022/03/26/chicken-curry-2/

  • सारे चीजों को मिलाकर बैटर को बनाने के बाद अब इसे 5 मिनट के लिए ढककर एक किनारे रख दीजिए, जिससे बैटर अच्छे से फूल कर सेट हो जाए।तब तक नाश्ते के लिए चटनी को बनाकर तैयार कर लीजिए।
  • चटनी के लिए मिक्सर जार में 50 ग्राम भुनी मूंगफली, 2 हरी मिर्च, 1 बड़े चम्मच कद्दूकस किया हुआ सूखा नारियल और थोड़ा सा पानी डालकर चटनी को पीस लीजिए।
  • चटनी को पीसने के बाद अब इसमें स्वाद के अनुसार सेंधा नमक डालकर मिलाएं और फिर इसमें एक छोटी चम्मच तेल, दो हरी मिर्च और थोड़े से करी पत्ता का तड़का लगाएं।
  • लगभग 5 मिनट बाद जब बैटर फूलकर सेट हो जाए तो गैस पर छोटा वाला पैन को रखकर इसमें थोड़ा सा तेल लगाकर पहले गर्म करें।
  • इसके बाद पैन में बैटर डालकर चारों तरफ फैला कर सेट करें और फिर इसे ढक कर दो से तीन मिनट तक मध्यम आंच पर पकाएं।

लगभग 3 मिनट बाद जब नाश्ता एक तरफ से सुनहरे रंग में पक जाए तो इसके ऊपर से हल्का सा तेल लगाएं और फिर इसे दूसरी तरफ पलट कर 2 से 3 मिनट तक फिर से ढककर पकाएं।

जब नाश्ता दोनों तरफ से अच्छे से सुनहरे रंग में पक जाए तो आप इसे एक प्लेट में निकाल लें और फिर इसी तरह से आप पैन में थोड़े थोड़े बैटर डालकर पूरे बैटर का नाश्ता बना कर तैयार कर लीजिए।

अब व्रत के लिए समा के चावल का नाश्ता और मूंगफली चटनी बनकर तैयार है। इस तरह से आप घर पर व्रत में या फिर बिना व्रत के भी इस नाश्ते को आसानी से बना कर खा सकते हैं।

सुझाव (Suggestion) –

आप चाहे तो इस नाश्ते को बड़े वाले फ्राई पैन या फिर तवे पर भी बना सकते हैं उसमें भी यह नाश्ता बहुत ही आसानी से बनेगा।

अगर आप समा के चावल के इस नाश्ते को बिना व्रत के बना रहे हैं तो आप इसमें अपने पसंद के अनुसार आप मसाले और सब्जियां भी डालकर मिला सकते हैं। सब्जियों को डालने से यह नाश्ता और भी टेस्टी बनेगा।

(2 votes, average: 4.50 out of 5)

Check Other Recipes


FOLLOW US

Plot No, 44, Hosur Rd, Konappana Agrahara, Electronic City, Bengaluru, Karnataka 560100

About Us


Beyond Eating is an Indian food blog and an Indian recipe library in Hindi. The site is updated regularly to provide quality recipes. The new food recipes mentioned here are awesome.

Contact us: twenty4eleven19@gmail.com

FOLLOW US :- https://instagram.com/ayush_rajput1996?utm_medium=copy_link


2020 beyond Eating | Food Recipe